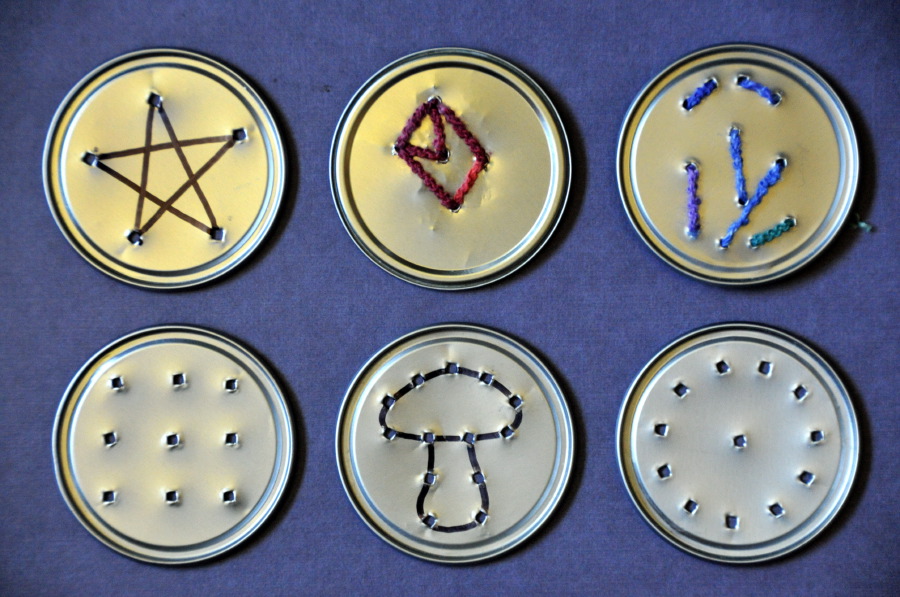
I have been collecting the tops from frozen juice concentrate containers for a while, they are such nice sturdy metal disks I was sure they would be perfect for some art project or other. Mini sewing cards was what I finally came up with. They are super sturdy, portable, and they stack nicely too because of the rim shape. They would probably also make great medallion necklaces, or super sturdy merit badges or medals.
If you want to suggest a shape rather than a more freeform geometric structure, then permanent markers can give you a reasonably lasting line on the metal.
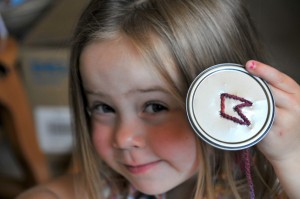
I intended to make this project for my daughter, but what ended up happening was that she made one for herself while I was testing the idea, and was quite excited by the idea of our writing instructions to show other little girls and boys how to make them. So I have a three year old model demonstrating how to punch holes in metal. If she can do it, obviously you can too. 😀
I think this would be a great project to get kids to try sewing if they are interested in pounding. Keep in mind though, that you are working with a hammer and nail, and that the backs of the punched holes will be sharp until you flatten them. Three year olds are (by demonstration) perfectly capable of doing this, but they should be supervised. Also, the younger the child the lighter weight hammer they should be using. This is a project where you need control, not force. I have a lightweight brass hammer for hanging pictures that is a great size for my daughter, when she misses the nail and hits her hand she doesn’t complain about it. I think she would have had a lot of trouble using a standard framing hammer with one hand, and it would have hurt if she missed. So if you only have standard weight hammers, and you want to do this with your kids, be prepared to hold the nail/disk for them, and hope they don’t smash your finger. 🙂 Or just go to the hardware store and buy one of those lightweight girly hammers with the flowers on the handle. Also, with a young child it’s a good idea to use a nail with a large easy to hit head, rather than a tiny-headed picture hanging nail.
-
What you need:
- Clean lids from frozen juice concentrate containers
- A large needle and yarn or a shoe lace for sewing
- A nail that is thicker than your needle/shoe lace
- A hammer
- A place to pound that has a hole or slot for the nail to go into
- A small scrap of wood/thick dowel to put beneath the disk to pound the sharp edges flat on.
The things-to-pound-on will make more sense after you read the instructions.
Start by drawing a shape or a set of dots with a permanent marker, showing where to punch your holes. You can carefully plan this, or just go for the random scattering of dots.
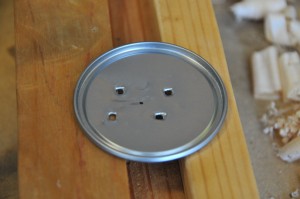
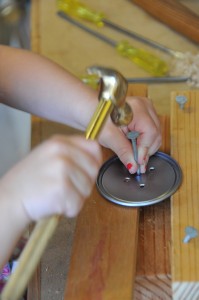
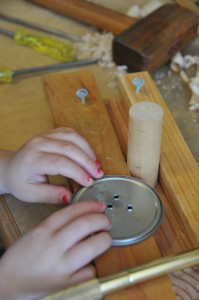
Place the spot you want to punch over some kind of crack or slot or hole. You don’t want to just nail into a piece of wood, it will be much more difficult than punching a hole into air. I made a small punching set up for Rebecca using a scrap of 2×4 for the base, and two small strips of plywood and pine that were about the same thickness. You could probably do just as well with the spaces between the boards on your deck or picnic table, as long as you don’t mind them taking the occasional hit from the nail.
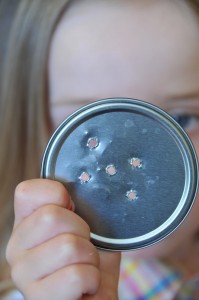
The nail hole, perhaps counter-intuitively, will not be round, but will probably be square. That has to do with the shape of the point of the nail, which is usually a square pyramid. If the point of your nail is actually cone shaped then you should end up with round holes. So if you care how the square holes are oriented, then pay attention to how your nail is rotated.
Pound away. You want the point to go all the way through, and the shaft of the nail to be going into the disk to make the hole large enough. If you pound the nail all the way in it will be a little more difficult to pull out, but three year olds can be enthusiastic.
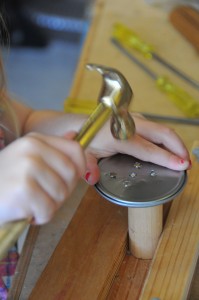
Once you’ve pounded all your holes it’s time to turn the disk over and bang flat the punched flaps of metal. This is where a small block comes in handy. Since the juice tops have a lip that doesn’t allow them to lie flat on a surface (unless you punch from the other side I guess) if you try to pound flat the punched flaps of metal you will dent the top. But putting something small under the top to support it will keep the top flat.
If you want to make a nice jig for a young pounder you can cut a circle slightly smaller than the disk out of 1″ thick wood. I was lazy and just grabbing scraps out of the workshop scrap bin. Luckily I was lazy when I tacked together the pounding jig too, and I only put three nails in it, so we swung one of the sides out and wedged a short scrap of 1″ dowel into the crack. It really doesn’t matter what you use here, a small square scrap of wood would work fine, as long as you turn the disk as you go, so that the spot you are pounding on is supported.
Once you’ve got your juice top supported, pound the backs of the holes flat. Rub your finger against the back when you think you’re done, to make sure there aren’t any sharp edges still sticking up. If there are, bang them some more with your hammer. It isn’t ever going to be perfectly flat, it will be a bit rough, but it shouldn’t feel like it’s going to cut you.
There you go, here’s my daughter’s randomly assaulted juice top that she was quite proud of.
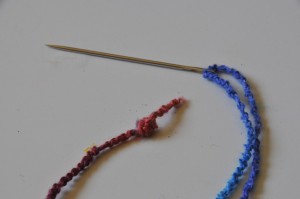
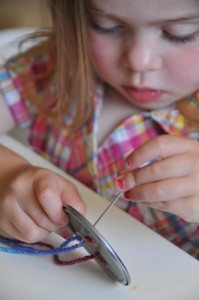
You can stop there, or you can get out the yarn darning needles,
and sew up your freshly punched juice tops.
Questions?

9 Comments
Add Yours →my kids would love this – the hammering part especially. Thank you for posting the how-tos in such detail.
Great idea! Love that you let your kiddos help make the sewing cards…I’ll be linking at One Crafty Place!
[…] One Inch World has discovered that juice tops are sturdy enough to make excellent custom sewing cards for your little crafters! Click here for more! […]
Thanks for posting this fun idea! We’ve linked to it at WebMD’s Healthy Begins Here blog, in the 10 Eco-Friendly Crafts for Kids post.
I love this idea! Thank you for sharing. My son will love the pounding! I can’t wait to try it.
[…] Juice top sewing cards from One Inch World […]
Goooood Gracious. 🙂 Thats Cooooool.
What a great use for those lids! Love this! Just featured it! 🙂
http://ucreatewithkids.blogspot.com
Thanks!