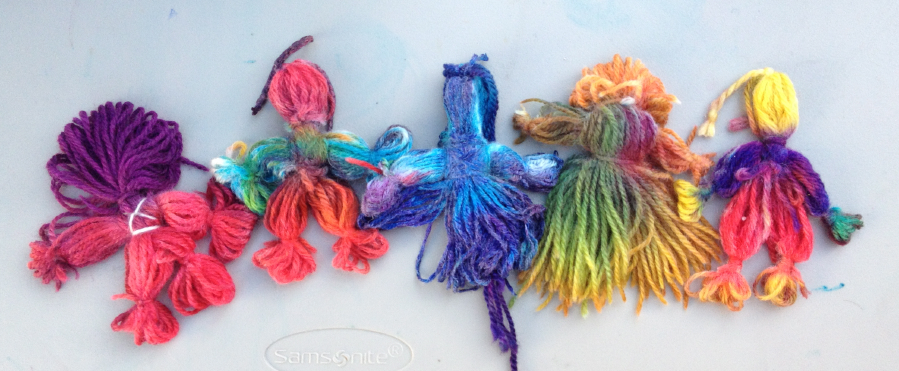
Acid Dye Part 3: Painted Yarn Dolls Post date March 22, 2013 Posted in Art Activities Tagged with doll, dye, tutorial, wool, yarn Comments 8
Acid Dye Part 1 Post date March 15, 2013 Posted in Art Activities Tagged with dye, tutorial, wool, yarn Comments 5
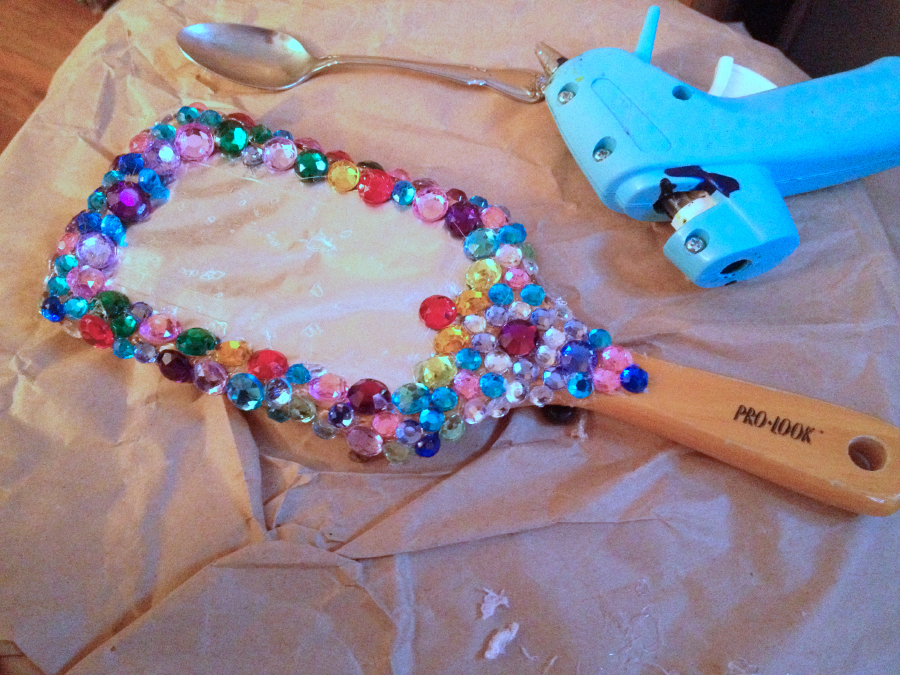
Magic Mirror Post date February 26, 2013 Posted in Art Activities, Crafty Tagged with dress up, jewels, toy, tutorial Comments 1
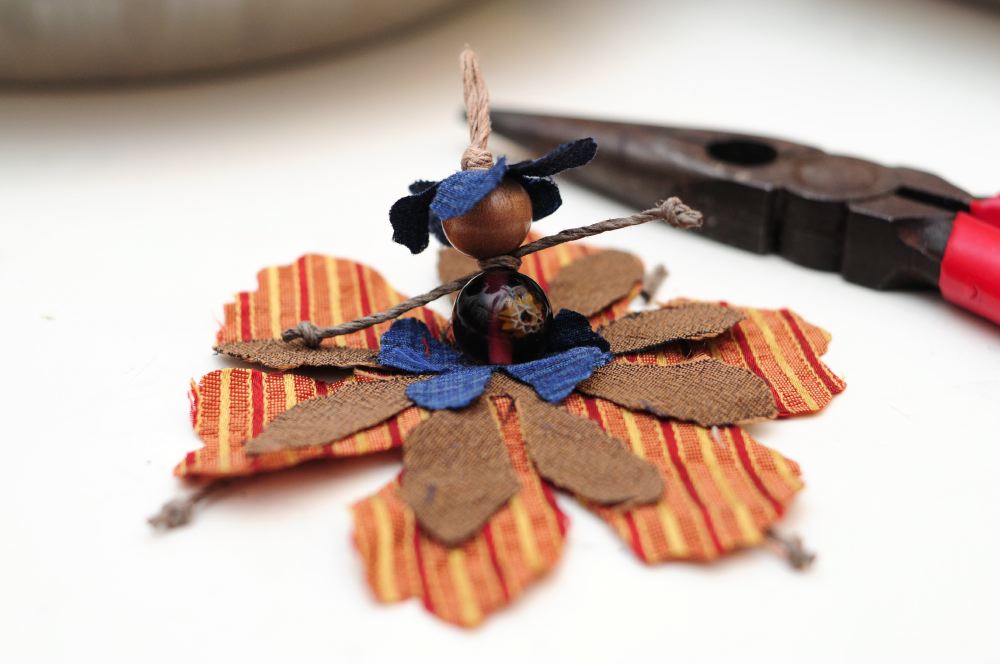
Spring Flower Fairies Tutorial (Friday Art Group) Post date March 24, 2012 Posted in Art Activities, Crafty Tagged with beads, doll, fabric, fairy, flower, holiday, spring, tutorial Comments 3
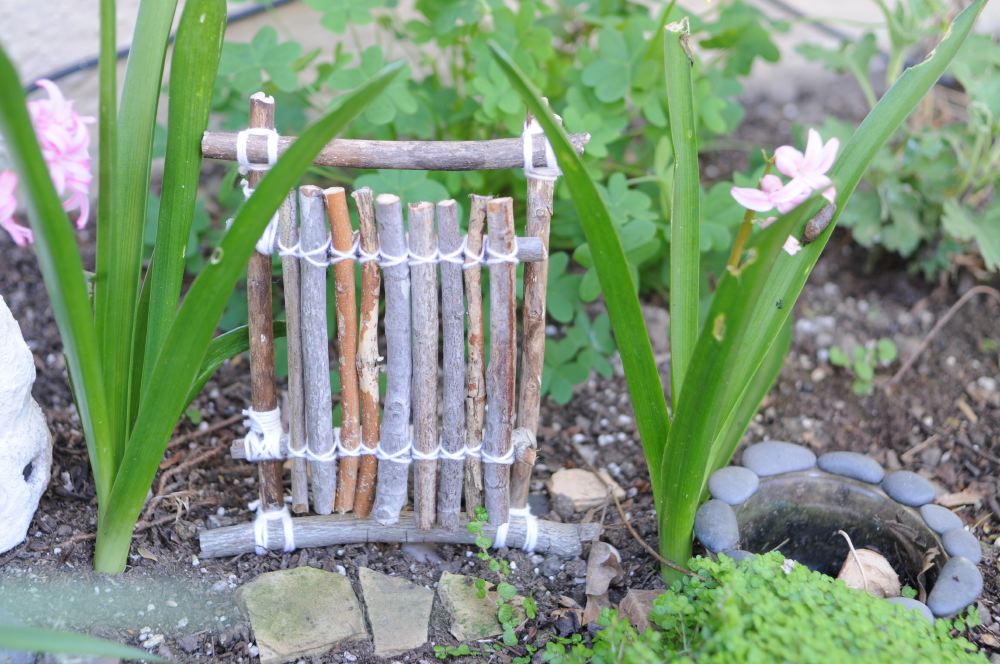
Leprechaun Door Sorta Tutorial Post date March 11, 2012 Posted in Art Activities Tagged with fairy, lashing, sculpture, sticks, string, tutorial Comments 0
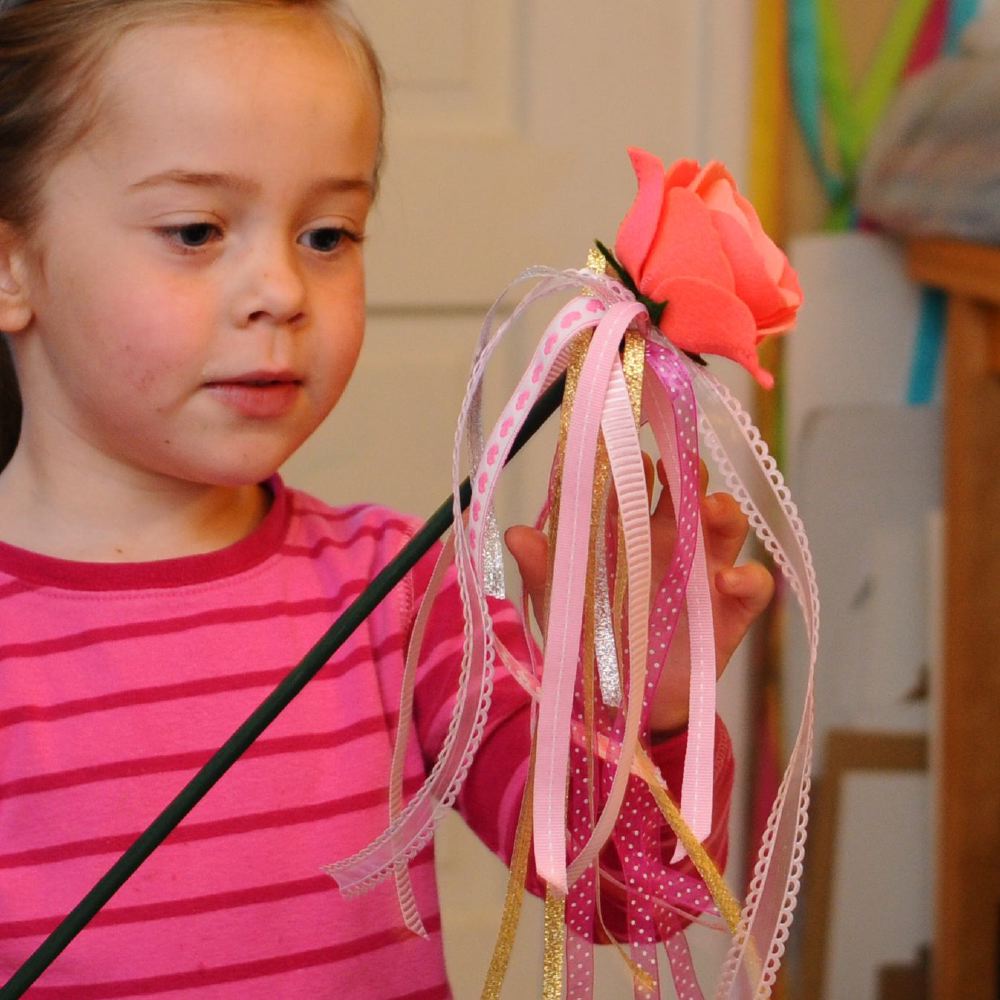
Rose Wand Tutorial Post date January 22, 2012 Posted in Crafty Tagged with felt, flowers, toy, tutorial, wand Comments 5