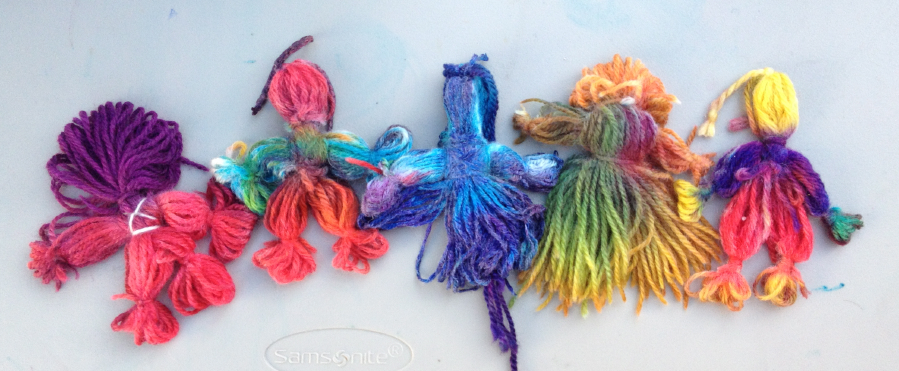
Acid Dye Part 3: Painted Yarn Dolls Post date March 22, 2013 Posted in Art Activities Tagged with doll, dye, tutorial, wool, yarn Comments 8
Felted Rock Doll Post date August 6, 2012 Posted in Crafty Tagged with doll, felt, rocks, wet felting Comments 2
The Oc-Toy-Put Revealed Post date May 14, 2012 Posted in Crafty Tagged with doll, monster, One Yard Wonders, plushie, sewing, toy Comments 16
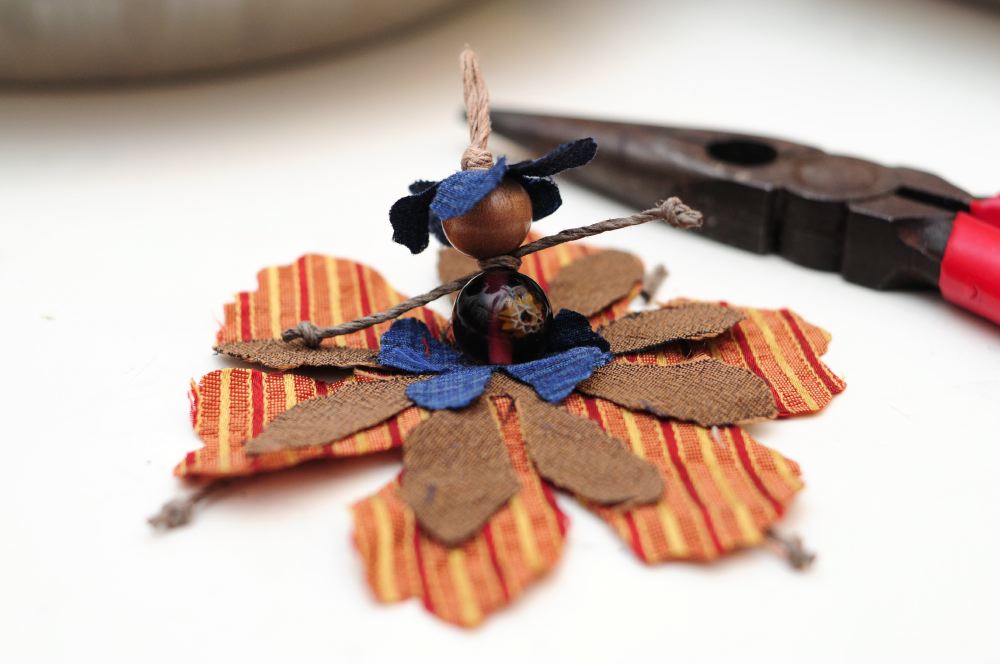
Spring Flower Fairies Tutorial (Friday Art Group) Post date March 24, 2012 Posted in Art Activities, Crafty Tagged with beads, doll, fabric, fairy, flower, holiday, spring, tutorial Comments 3
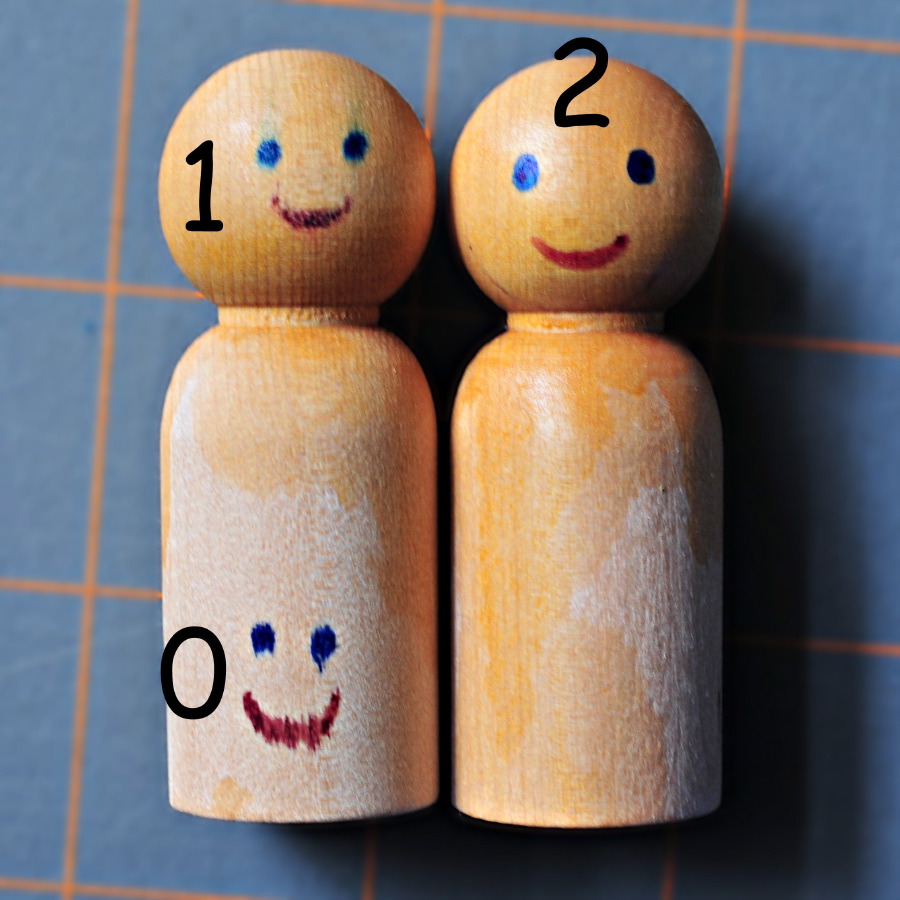
How to Keep Markers From Bleeding on Wood Post date May 20, 2011 Posted in Crafty Tagged with doll, marker, technique, tutorial, wood Comments 10