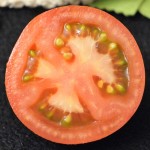
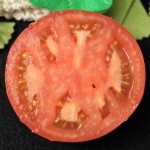
Step 1: Research! (actually step 0 was make a bad tomato I think…) Have you ever really studied tomato slices before? They are surprisingly not that symmetric. Do you slice your tomato through the stem? I slice mine through their equators. If they are squatty tomatoes. If they are lumpy heirloom tomatoes I cut them in chunks and them slice them any which way. I had a point somewhere. It was that tomatoes look so many different ways that you have a lot of freedom to play with the inside shapes. Don’t think there is some ‘right’ tomato slice or that they have to be perfectly symmetric.
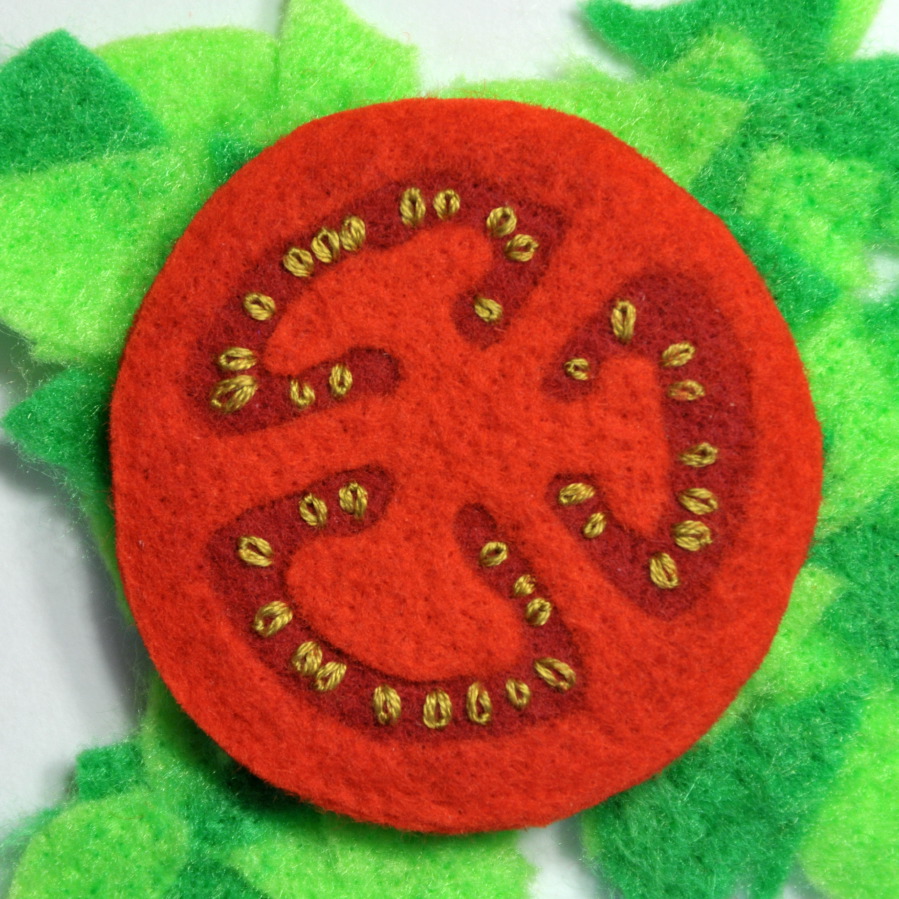
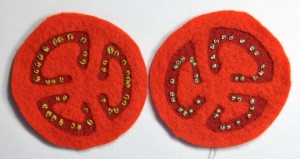
I did make some funny looking tomatoes that no one could tell what they were… so there *is* room for bad tomatoes, but there’s a lot of leeway. And you could tell what they were if they were part of a sandwich set, but the first guess was ‘flower?’. I originally made the flesh red and the pulp pink and I left out the seeds. They were okay, but not very convincing I guess. The pulp of a real tomato is actually darker than the flesh, and the seeds seem to be pretty important. Here’s what I finally came up with:
This tomato only uses two felt colors, if you wanted to go for extra realism you’d have to make the mushroom-y bits that the seeds stick to a lighter color than the rest of the flesh. [There’s an example of that at Akiyo’s amazing gallery in the lunch section. If you want to read the text you can use Google’s translation, it works pretty well.] But since I was needle felting the whole thing together I didn’t want to deal with the overlapping and shrinkage calculation of two ‘top’ layers, and I didn’t want them to overlap. Onward.
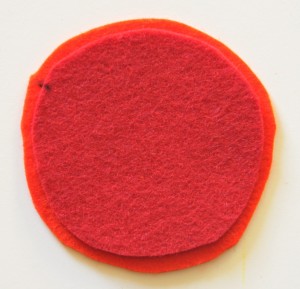
First cut out four circles, two large circles in the tomato flesh color, and two pulp colored circles 1/8″ smaller all around. If you want perfect circles you can trace a drinking glass or something, but tomatoes aren’t really circles anyway, so just cut them out freehand. Mine are pretty lumpy, aren’t they! But I trim them at the end.
Do make sure the two large circles are the same shape, and once you have everything cut out and lined up, mark the circles near the edge so that you can line them up again. While they are lined up mark one on the front and one on the back, one on each side so that you can put the marked sides inward and you won’t see them on the finished tomato. (Or use a water-erase marker, I -shockingly- just used a permanent marker.) Mark the smaller pulp pieces in the same spot too. You want to be able to put the whole stack together so they fit neatly. If you do cut out perfect circles then you can skip this step, because they will line up no matter how they are turned.
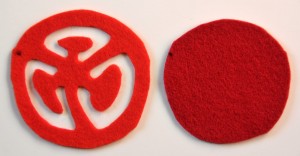
Next cut out holes in the larger tomato flesh circles for the pulp to show through. Decide how many holes you want, 3,4,5… then use a pen to divide the circle into sections and draw a C shape for the pulp hole into each of them. Make sure to leave a 1/4″ border around the outside of the circle with no holes, so that it will overlap by 1/8″ with the pulp circles. Otherwise you will have a hole through your tomato. Cut out the marked holes with a sharp pair of scissors. Once you cut out one side you can match it back up against the other large flesh circle, marked sides together, and use it as a template to mark the holes for the other side. Then cut the holes in the second tomato flesh circle.
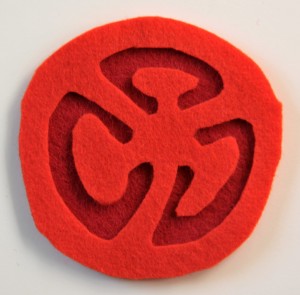
Put together each inside pulp circle with one cut out flesh circle, lining the marks up. (You should have two pairs, don’t put the whole thing together yet.)
Either needle felt the flesh cutout to the pulp circle or use a running stitch or applique stitch around each of the cut out holes to join them together. Or, heck, you could use fabric glue if you’re in a rush. I needle felted mine.
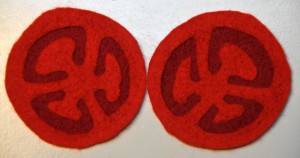
Now that you have two hopefully solid tomato sides it’s time to add the seeds. Scatter them around, try not to space them too uniformly. I used two methods here, lazy daisy stitches in an ochre thread and green-on-the-inside clear seed beads. I’m not sure which I like better, what do you think? Looking at them now I think there are too many seeds and they are too small, but some varieties of tomatoes have lots of small seeds, so that’s okay. (^_^) I think it would also be interesting to try painting the seeds on with acrylic craft paint, but that might be more likely to be eaten off? I haven’t tried painting felt yet, I’ll have to add that to my imaginary list. Does acrylic stick to wool felt, or do you have to use acrylic or polyester felt? Questions to research.
After you have your seeds on line your tomato sides up back to back so that the flesh patterns match up. At this point you can needle felt them together, being careful to only go through the flesh sections so you don’t mess up your embroidery or break a needle on your beads, or you can stitch them together around the edge. After you felt them or before you stitch them trim around the outside edge to neaten it and make sure the two pieces line up perfectly.
Yum! (And am I glad to be done, this tutorial took forever to write up for some reason, and I’m not that happy with the pictures, I really had to force myself through this one and not wait for nice light. But moving on into the new year, let’s be more positive.)
So what do you think, embroidered or beaded seeds?


60 Comments
Add Yours →Thank you for this tutorial. Your efforts are greatly apprecieated. I would do embroidered seeds because I think the beaded seeds would be unsafe for small children.
I mean, if you are afraid of your child eating a LOT of the beads, sure. But a baby isn’t going to choke on a seed bead. 🙂 Don’t worry. 🙂
Wonderful tutorial! I like the embroidered seeds.
I agree, I think the embroidered seeds are safer; although, for older children where there is no risk of choking, the beads would be lovely. I know a lot of 4-7 year olds who would LOVE to make felt sandwiches, etc.
[…] I’m really really wanting some felt food but I have never sewed a felt anything before. I’m going to try out the pasta pattern I posted from one inch world and then I am going to move on to more complicated things. Oh, speaking of one inch world, she just posted a really cute tutorial for making your own felt tomato slice. […]
I like the embroidered seeds best. I only just found your website and wanted to say how fantastic I think it is!!! Keep it up!
Amanda. xx
great tutorial, the tomato slice looks very realistic
love the butterfly baby below, adorable
Great tutorial, I really want to learn how to needle felt now! I like the embroidered seeds best.
Great tutorial! thanks! I’m going to give them a try!
[…] tutorials you will want to look at when you visit her site. So if you want to make this tomato visit “one inch world” and get all the instructions. The creator of this tutorial says: Scatter brained crafty mama. I […]
I’ve been gathering felt food tutes to make a felt food roundup and I think this is my favorite so far. It’s gorgeous!
What a realistic looking felt tomato slice!! Thanks so much for sharing with us 🙂
I love your tomato and let me say how hard it really is to look at something and translate it into colors and it be recognizable. Here are my felt tomato slices that I made as part of a pattern set. By themselves, people have no idea what it is! lol, but with the sandwich, they figure it out really quick!
Thank you so much for this pattern !
I’m trying it ! (tomorrow on my site)
really..it is great…thx for sharing it…^^ i wanna try to make it then
it is my strawberry:
http://ilikesunflower.wordpress.com/2009/08/14/gantungan-kunci-strawberry-dari-kain-flanel-ala-sunflo/
Hi…I’m Laura from Italy; I also made felt food
http://chebirba.blogspot.com/search/label/Felt%20Food
I’d like to invite you to visite my italian blog… Laura
[…] mushroom slices, broccoli florets and tomato slices. For the tomatoes, I followed the tutorial from oneinchworld.com. Broccoli florets, tomato and mushroom […]
[…] are looking to make your own pretend play items you can try a some of these links, Snazzle Craft, One Inch World or Ume […]
[…] oneinchworld Ningún […]
[…] Tomatenscheiben […]
I love this!!! It is the best tut for tomatoes I have found. I think I would rather use embrod. seeds instead of beads, so my little one doesn’t pull them off and eat the.
[…] dilimleri burada Yazar Ekim 2, 2010. by admin. Kategorisi Genel. Etiketleri . Bu yaziyi sevdim? Twitter […]
This is the best looking felt tomato slice I have ever seen. Thanks for sharing. I can’t wait to get the right colors of felt to try it myself. I am curious about the needle felting. Do you just poke the needle through all of the felt layers? No roving yarn involved? I like that idea so as not to have alot of stitch marks showing. This felt food making is addictive, but at least no calories in it. 🙂
Thanks! It always helps when you start by looking at the real thing. Yes, to needle felt layers of felt together, you just lay them on top of each other and poke them. It helps them stay together if you flip them over and poke them from the other side too, but that does bring the back color through to the front. For the tomatoes I felted together one middle and outside and then the other middle and outside pieces, then did the seeds, then needle felted the two sides together in the areas where the seeds weren’t. Felting felt is fun! You can actually felt on yarn, or regular cloth too.
THX to you, I made 2 tomatoe slices for my sons’ kitchen 😉
Merci 🙂
Thanks, so much, I love to see when people use my pattens!
How do you cut holes in felt. I want to cut circles in different sizes. I don’t think they would be even if I used scissors. What do I use?
I use sharp scissors. If you want them to be exactly the same, make a paper pattern and use a little bit of glue-stick to hold the pattern down to the felt. That will keep the pattern and felt lined up. Then you can cut the pattern out. Depending on the shape you want, you might also be able to use a die-cutter like sizzix to punch the shapes out.
Thank you for coming up with these instructions and sharing them. Here’s what I made: http://thebigmango.blogspot.com/2011/06/breadmaking-of-different-kind.html
I, with my currently flakey internet, am having trouble commenting on your blog post, but your sandwich is great! You can do the tomatoes with a sewing machine which makes them much faster, essentially stack the three layers, uncut, sew around where you would cut, then use a pair of sharp scissors to cut out just the top layer inside the stitching and 1/8″ around the outside stitched circle. Does that make any sense? I will try to find someone’s blog post later that talked about it, but my internet is really not working right now.
[…] Tomatoes were adapted from this very fine tutorial on One Inch World. […]
[…] out Child of the Nature Isle and her sweet felt sandwich, One Inch World and these gorgeous little felt tomato slices, and then there are graham crackers, pie, pizza (try not to die at the cuteness there- wow!), and […]
WOW! I am searching around for felt food patterns and I found your fairy garden! Both will be appearing on our blog soon (well, the fairy garden won’t be re-createable until spring here in MN). The felt food – I’ll let you know how it turns out! ~Ethne
I’m really glad you’re feeling inspired!
Nishas.org…
[…]Felt Tomato Slice Tutorial « One Inch World[…]…
[…] slice of tomatoes […]
i love these!
Thanks!
Love your tomato slice! Thanks for the tutorial.
You are so welcome!
Did you do this with acrylic felt? I haven’t been able to find much information online about whether you can needle felt with acrylic and every tutorial I’ve seen has referred to roving wool on top of felt.
I have needle felted acrylic felt. That was actually the first thing I tried, because that was what I had. 🙂 You can just cut out two pieces of acrylic felt and start poking them together. You can basically tangle any kind of fiber, but some will work better than others. I have had some success needling wool felt to cotton quilting fabric. You can also needle yarns into felt. Longer fibers will work better for this, cotton has such a short fiber that it is hard to get it to tangle with anything, but you can needle other fibers into cotton. None of this is really ‘felting’, which technically is the scales of wool (or other hair) fibers locking together, it is really more like ‘tangling’ if you want to get particular, but it does work!
[…] vaguely followed a tutorial from Wee Folk Art for the bacon and eggs and from One Inch World for the tomato […]
Embroidered seeds are the go. Thanks for the effort because now I have a great tomato to follow for my little girl’s felt sandwich
Hurray! I would love to see it.
[…] ?One Inch World […]
[…] oder einfach die Tomaten […]
Thanks a lot for this simple and efficient (= great !) tutorial. I sew yesterday some tomato slices in Annecy (France) and I will send them (and many other felt food pieces) for Christmas to my goddaughter in Canada.
International felting thanks to you !
I’m glad you enjoyed the tomato tutorial, thanks so much!
[…] easy to make, with lots of ideas on the web. I particularly appreciated OneInchWorld’s felt tomato tutorial. And found my inspiration […]
great tutorial! really helped me. My creations are here with a link to your blog! http://createnic.wordpress.com/2013/12/
Thank you so much!
[…] Tomato Slices: These are the coolest tomato slices by One Inch World. I used them as my inspiration. My tomato slices are much more simple… well because I am lazy like that. […]
[…] bread. Credit goes to Katherine from one inch world who back in 2009 published her beautiful needle felted tomato slices. The felt tomato slice tutorial involves some hand and some machine sewing (of course, you can do […]
[…] One Inch World » Blog Archive » Felt Tomato Slice Tutorial […]
[…] tomates […]
domperidone use by men chinakari39-domperidone how many ounces of milk for a 6 month old
[…] Fatia de tomate por One Inch World […]
[…] by http://oneinchworld.com/blog/index.php/2009/01/felt-tomato-slice-tutorial/ […]