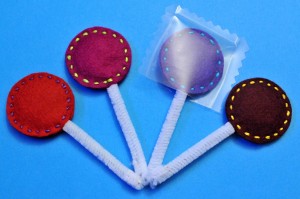
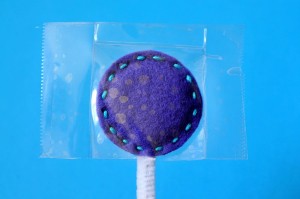
Felt lollipops for Halloween, or anytime you need play-sweets. Start your own lollipop sweet shop with dolls (you can even twist the pipe cleaners around their hands so they can hold them if you make them long enough), or engage in some trick-or-treat play drama, or maybe you just need something cute for the middle of your table. These are so simple you don’t need a tutorial, but the dimensions and pictures are useful, right? 🙂
Materials:
Half a pipe cleaner,
two 1.5″ circles of felt,
embroidery floss,
2″ wide packing tape or clear contact paper.
(I used wool felt, but craft felt should work fine.)
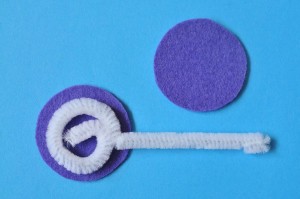
Twist one end of the pipe cleaner up in a spiral that is a little smaller than one of the felt circles. Fold about half an inch of the bottom end up so that the wires at the bottom won’t poke anyone.
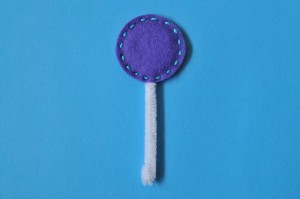
Stitch around the edge of the circle with contrasting (or matching) embroidery floss, trapping the pipe cleaner inside. I used all six strands because I wanted the stitching to really stand out. To make it easier to sew with six strands you can divide it into three strands, thread it onto your needle, pull all six of the ends together and knot them. Then you aren’t trying to pull twelve strands of floss through the felt with each stitch.
Cut three pieces of packing tape or contact paper:
* One 1.5″x3.25″ piece for the inside of the wrapper, cutting this without getting it to stick to itself is a little tricky!
* Two about 2″x3″ pieces for the outside. Don’t worry about the exact size – just big enough to cover the inside wrapper and hang over the edge by at least 1/2″, but more is fine.
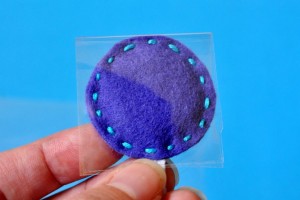
Take the narrow piece of tape and fold it over the top of the lollipop, sticky side out – you don’t want the tape to stick to the felt. The folded tape should be just a tiny bit bigger than the lollipop.
Place the larger pieces horizontally and sticky side in on the front and back, lining up the bottom edges as best you can and letting the other sides hang over. Press it all together and smooth it out with your fingers.
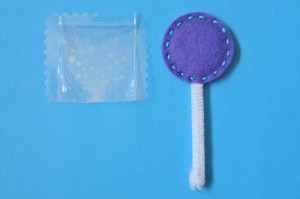
You should now have a wrapper that slides on and off. Take it off and trim up the edges. You can cut them all flat or cut some of the edges with pinking sheers – for a traditional lollipops from a roll look trim the top and bottom edges flat and the left and right edges crinkly. I decided to pink mine around the top three edges, because crinkly is cute!
These are really fast, so make a bunch! Time for play!


12 Comments
Add Yours →Cute and simple, just my style. Thanks for the tutorial!
How cute and what a great idea for the dollies!!
Thanks so much for this cute tutorial, my daughter would live on lollipops if she could, so perfect for pretend play for her. Pics at http://www.flickr.com/photos/iwannabcreative/4017514157/in/photostream/
Those are so SO cute! I love felt food projects. I’ll be linking, thanks so much for this!
I linked to this post here at my blog whilst writing about felt food tutorials.
~Melissa Until Wednesday Calls
Thank you so much for this tutorial! So cute and so easy. I made a few for my daughter this afternoon. I’ll be posting pictures on my blog later this week. I will link back to you.
[…] Lollipops […]
this would be perfect for a katy perry california gurls costume!
I am so out of touch with popular culture! But Youtube can fix anything I guess!
[…] little girl who has a sweet tooth would love these. Click here to learn how to make the lollipop. As for the ice cream bars, I just made them by looking at the […]
[…] little girl who has a sweet tooth would love these. Click here to learn how to make the lollipop. As for the ice cream bars, I just made them by looking at the […]
[…] How great would these felt lollipops be for a baby shower? They might be mistaken for felt rattles, but that’s just fine, too. To make them extra-special, add a little dried lavender inside.nGet a free felt lollipop tutorial from One Inch World!n […]