This no-internet thing is killing me. Technically it isn’t no-internet it is 300 Bytes per second internet, 2KB/s on a good day, when you can actually download your email. Expect posts to be sparse (as they have been!) until we get back in the middle of July. But I really wanted to get this tutorial written! So I am sitting in a parking lot one town over getting internet over my cell phone via bluetooth. (^_^) If only we had cell coverage at the house! No cell phone, no texting, no data! (>_<)
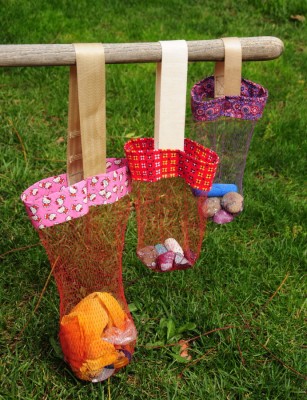
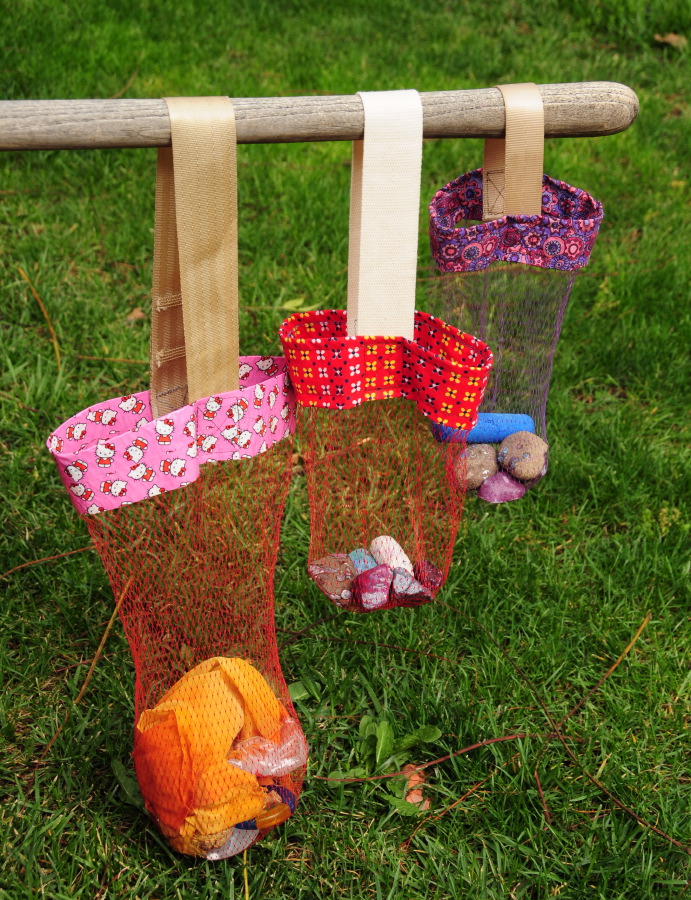
These bags have been really useful, especially since my husband has started collecting rocks like a mad man! He can fill a bag up with dirty rocks and leave it in a creek to wash off, hanging off one of the many fallen logs around here, and then sort through his clean-ish rocks before carrying all (five pounds of them) home. Really that just lets him find the right five pounds of rocks to carry home. Good thing orange bags are sturdy. I love you sweetie!
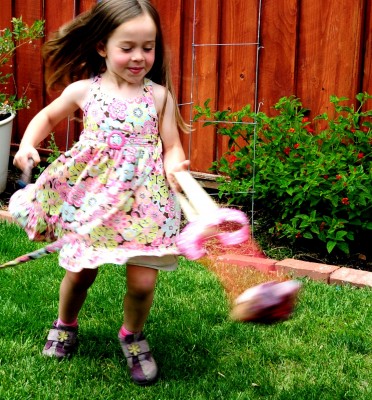
These will be fabulous for carrying our sand toys to the park too. (The sand toys do *not* come in the front door, they live outside in a plastic basket.)
- Materials:
- one mesh (orange or other) produce bag
- a foot or more of canvas strapping or salvaged car seat belt
- 8″ x (length around top of bag + 1″) piece of fabric for top binding –
or duct tape, brief alternate discussion at bottom.
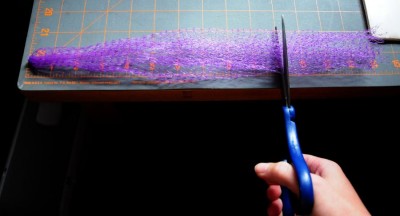
Start by stretching your bag vertically, this will compress it horizontally. Decide how long you want the mesh part of the bag to be, and trim it straight across. Look, I’m being good and using my paper scissors not my fabric scissors. I probably shouldn’t admit how may pairs of scissors I have. I gave one to my husband and he immediately wrote ‘no cutting fabric allowed’ or something like that all over every surface. I was impressed with how many places he managed to fit it in, both blades, each of the handles possibly more than once, three star job. If I wasn’t in Vermont I’d go take a picture. But anyway. Trim your bag, or not, either way give it a vertical stretch though.
Gently flatten the opening out without stretching it much if you can, and measure the width. If you stretch the bag out too much before you sew the binding on it will go all lettuce-y around the top edge when you try to carry something heavy in it. It doesn’t much matter structurally though, it’s just an esthetic thing.
We are going to make a 2″ wide binding next, I went with the grain of the fabric rather than cutting it on the bias because I am cheap and we aren’t going around any curves. Since the binding is going to be double fold we need the fabric to be 8″ wide by the circumference of your bag + 1″ for rough seam allowance.
Cut your fabric 8″ x (width of bag * 2 + 1″)
So if you measured the width of your bag at 6″ you would cut your strip 6*2+1 or 13″ long.
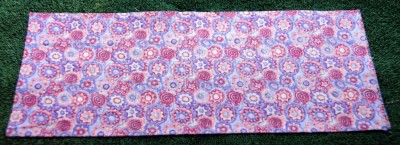
Press your fabric flat. I hate ironing too, but you can’t make clean double fold binding without some ironing.

Fold it in half (hot dog bun style!) so that it is 4″ tall and press the fold.

Unfold it and fold one edge up almost but not quite to the middle crease and press the fold (don’t press out your center fold.)

Fold down the other edge almost but not quite to the middle crease and press that fold. (Bet you didn’t see that coming.)

Re-fold it in half and give it one more press all together.
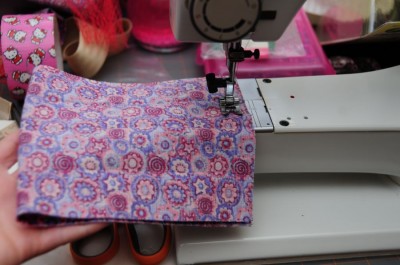
Unfold all your careful creases and pin the two short (8″) edges wrong sides together. Sew together with a 1/2″ seam.
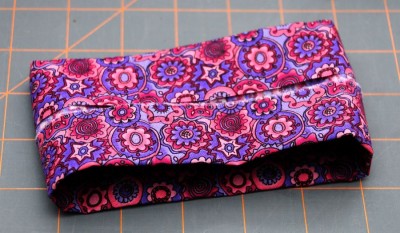
Open up the sewn seam folding it open or to the side with your fingers, and then re-fold the outside edges of the binding to the center.
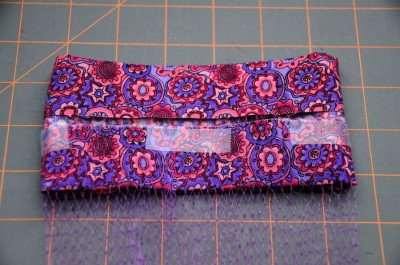
Slip the binding into the opening of the bag, lining up the top edge of the bag with the middle of the binding. (It’s hard to see the purple on purple, but there is netting over the lower half of the binding in that picture.) I found that pins didn’t work very well to hold the bag in place, so I used removable scotch tape. Whatever your device secure the bag evenly around the binding. Sew the binding to the bag 1/4″ to 1″ above the bottom edge of the binding – it will only be visible from the inside of the bag, so pick where you want the extra seam. Remove the tape as you go, if you sew through it it will get your needle gummy. I learned my lesson with the duct tape…
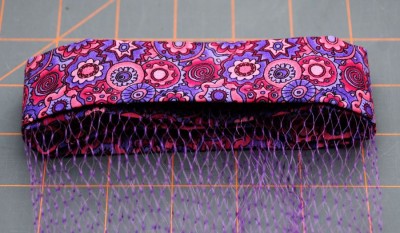
Fold the binding over the outside of the bag, along your handily pre-creased fold line.
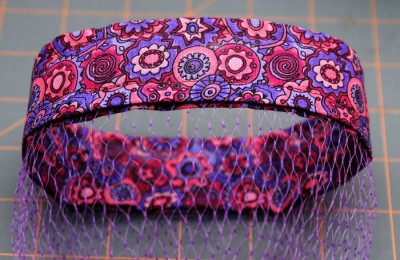
Stitch around the binding 1/4″ or so above the bottom edge for structure, and 1/4″ from the top for pretty.
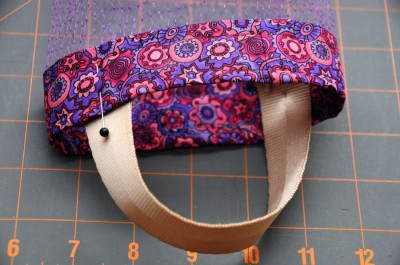
For each end of your strap fold the edge under and pin on the inside of the binding.
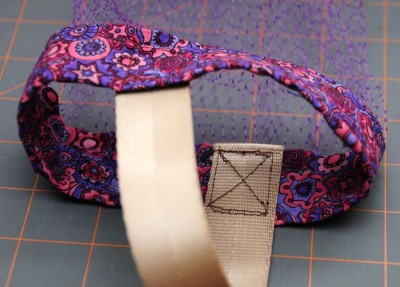
Stitch a square with a cross through it over the end of your strap for that ‘I know what I’m doing’ kind of look. Preferably do not use a needle covered with duct tape goo, because it will skip stitches. I’m hoping I don’t have to clean out the inside of my machine now…
and play!
For the duct tape version, the instructions are pretty much the same, except instead of making a binding, wrap (gently) one piece of duct tape around the outside of the top edge, one around the inside of the top edge, and then one folded over the top edge. I sewed the strap on the same way, but frankly that was a dumb idea because I trashed my needle, I cleaned it, but I still couldn’t get the tape gum out of the eye, and there may be some inside my machine. If I made it with duct tape again, (which was great and quick and really satisfying) I would probably give it a tape handle too.
The end! And I can’t wait until I get back to the land of internet, where I can actually open multiple pages simultaneously in links, rather that one every five minutes! Ironically, DSL is finally coming to these sad lands, due to be installed three days after we leave!!!

24 Comments
Add Yours →Of course, internet WOULD arrive once you leave!
You are quite the dedicated blogger, to post this via phone! Very clever idea, too! =)
Haha, if I was truly dedicated it wouldn’t have taken me a month!
I KNEW there was something I could be doing with those mesh bags!!!
This is awesome. Well done!
Thanks so much!
Thanks for the great idea! I am a new Gramm to two precious baby girls and I will NEED to make these when we go to the beach to collect shells and neat stuff!
Thanks so much, we’ve had a lot of fun with them and I’ve found myself eyeing produce based on the color of the mesh bag it comes in!
Great idea, thanks for sharing.
Thanks!
great idea! wandered over from the crafty crow 🙂 it’s amazing what you can create from everyday things when you just open your mind! thanks for the great idea!
Thanks, I was really surprised to see the sudden flush of comments!
These are crafty and aesthetic! I love them…and duct tape comes in some pretty nice colors and patterns these days. I have some tie-dye duct tape I can’t wait to put to use. Thanks!
I think it might have been the roll of Hello Kitty duct tape that originally inspired this idea… 😀
been looking for a use for these bags! I have a stash of them in my crafty drawer. thanks for the idea, these would make great easter egg hunt bags
Yes, egg hunting sounds like a great thing to do! They are great for wet swimsuits too.
Oh my goodness! You are brilliant. I LOVE finding uses those mesh bags and yours is the BEST I’ve ever seen. Must make these. I think I could even use them for buying veggies or apples in and they are much prettier than what I use now. Thank you so much for sharing your photos of this project.
Thanks! I did steal them from my shopping stash originally, I just re-use the handle-less mesh bags, but maybe I should make more of them with handles to take shopping. Wouldn’t want to make them too heavy though, or I would end up paying more for my veggies! :-O They are still pretty light though.
I just get the check-out person to lay the handles of my bags to the side of the scale. Like position it so the handles aren’t on the scale. That way I don’t pay for the handles.
Yours are SO pretty. My daughter and I have all sorts of plans for making super pretty ones like yours. Thanks SO much for these!!! BRILLIANT!
And thanks to Heather for pointing me to this! LOVE stuff like this!
That’s an interesting idea! I might be able to explain that to some of our check out people, but probably not all of them. I should really get out my husband’s gram scale and see how much the bags actually weigh. And Thanks!
Love this idea! My kids are 9 & 11 and i am trying to think of something to make out if this idea for them. Along the veggie bag idea, I bet you could salvage some old zippers and put those in instead of the handle and have a veggie bag that you could use instead if the plastic ones.
Yes, you could add a zipper, although I just use the mesh bags as they are for produce and they work fine. Sometimes I tie them shut, you could also use a rubber band, but generally as long as you use one that is large enough they work fine without shutting them.
I guess your kids are too old for sand toy bags, but you never outgrow treasure hunting, at least not in our family!
I love this idea and really want to make one, but what do I do if my bag is open on both ends? Any ideas for securing the bottom? I could just tie it off and turn it inside out, but adding some fabric to close up the bottom would be better. Thoughts?
Sorry I’ve been so behind with my life! When I am making plain produce bags I leave the bottom in its naturally scrunched state (don’t stretch it out, or only a little) and sew across the bottom. I think if you add fabric to the bottom, if you are collecting wet things it might not be as pleasant, because the bottom fabric won’t dry out very quickly. My husband likes to collect wet rocks, and then he can hang them to dry before carrying them home, but I think the fabric at the bottom would stay wet too long. I think I would turn it inside out, sew the bottom shut, turn it right side out and sew it again, kind of like a french seam, but not necessarily completely enclosed. And I would use synthetic thread such as polyester or nylon.
[…] faux rococo frames, jewelry 14: Mesh Bags: bird nest helper (with recycled cat hair!), gift bag, beach bag 15: Cardboard Tubes (PS there are 100 more under the sink): pincushions, Chinese lantern style […]