Painting with marbles is so much fun, and you can get really spectacular results at any age.
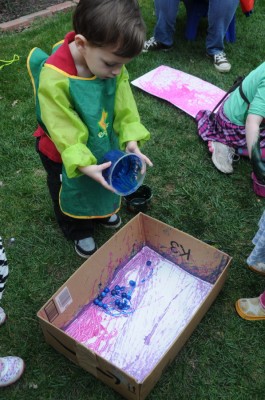
Step 1: Find a box or deep tray to hold your paper. If you happen to be lucky enough to get a K3 size box from amazon it is almost the perfect size for 12×18″ paper, a little small in the long direction, but that just curls up the very edge of the paper. Awesome. Rebecca filled them with water a couple days before our playgroup so they warped. Not so awesome. They still worked, but after that they were a little bit humpy and it made it a little harder to roll the marbles around. Now we need to figure out what we can order from Amazon to get more K3 boxes. Okay okay, no.
Step 2: Get marbles painty and dump them in your box. We did this two different ways. When there were fewer kids and I wasn’t worried about them just squirting all the paint in their box, we dumped all the marbles into a corner and squirted a little paint over them. This lets you get a light coat of paint on your marbles and they still roll around really easily, but there is enough paint on the paper to make great tracks.
The second way was to dump the marbles into a small container with a layer of paint, and shake them around until they are coated, then dump the painty marbles into the paper box. When we did it this way the marbles tended to start out really goopy and slide around rather than rolling until they had lost some of the extra paint. It still worked fine, but it wasn’t as tactile-y satisfying. It might have worked better if there was barely any paint in the container. It did successfully kept the kids from squeezing all the paint into their tray.
Of the two methods, squirting a little paint onto the marbles (or just somewhere on the paper) while they were in the paper tray made rolling the marbles around more satisfying for me.
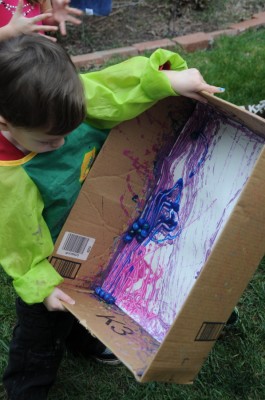
Step 3: Roll the marbles around.
Step 4: Repeat with another color.
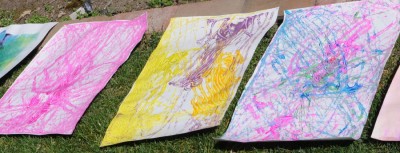
Step 5: Admire your awesome art piece. I know, I know, it’s all about the process, but these come out really pretty, especially if you layer lots of colors. I don’t actually have pictures of my favorites, which layered clear glitter gel colors and black.
This activity was also excellent for getting a little boy who steadfastly resists our usual art projects really involved, which was an awesome bonus.

4 Comments
Add Yours →The boxes/lids from copy paper reams are the right size. You can often pick them up in the recycling area of the local copy shop.
Oh, great idea, thanks!
I need to look for some of those box lids Kelli mentioned in her comment! I think Johnny and Lily would especially enjoy this craft – and it is perfect to do outside (if Massachusetts EVER warms up!!!)
For the smaller kids I think a box with sides that are a little deeper keeps them from throwing the marbles out when they shake it. But maybe you could get the bottom of a paper box and cut the sides down half way?