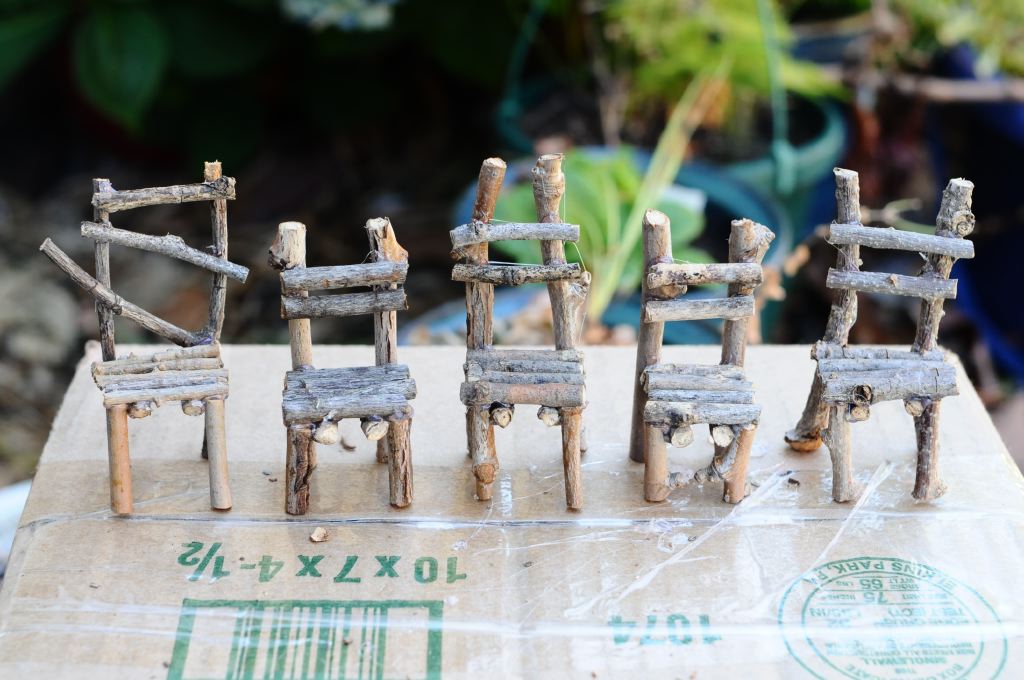
Aren’t these cute? Am I allowed to say that about my own work? I was so thrilled with how they turned out, and how really simple they are to make that I had to photograph the construction of one so that everyone else could have fun making them too.
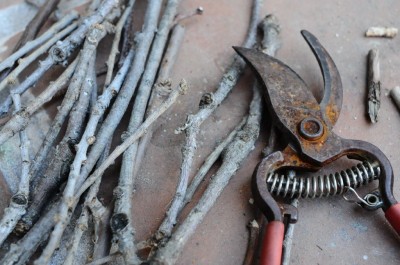
To build these you need some basic supplies, a handful of twigs, pruning shears or other clippers or saws, and a glue gun. It would be nice to make these without glue, I bet they would be really nice with some lashing, but the glue gun makes it so fast! I made six chairs in under an hour, which, given how long it takes me to make most things, is pretty darn fast. Oh seductive glue gun. Also the pruning shears, I’ve done twig work before with a small saw (and 1/2″ twigs instead of 1/4″), and the pruning shears make this SO much faster, snip snip snip and you have three tiny ‘boards’.
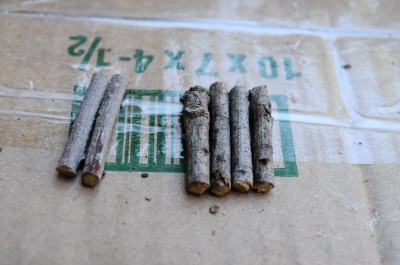
So. To start, find a likely looking stick, and clip six twig sections all the same length, about an inch. Four for the seat and two for the back.
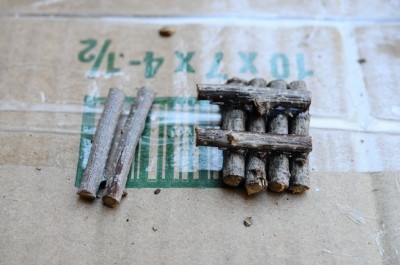
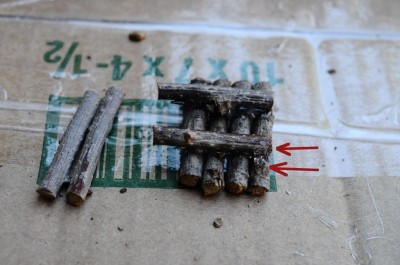
Line up the four twigs for the seat, and cut two more twigs that are one twig width longer than the seat depth. These will be the under-seat supports, we are building the chair upside down. Glue them on about one twig-width in from the edges of the seat.
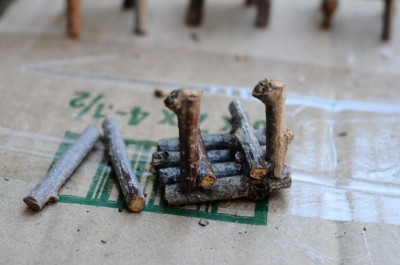
Now for the front legs. Cut two twigs about the same length as the seat twigs, one twig-width shorter is nice. Put two drops of hot glue on the front edge of the chair where the leg will go, one on the bottom of the seat, and one on the outside of the under-seat support. This will give the seat leg glue-support on its top and side and make it much stronger than just glueing it straight onto the bottom of the chair. (Despite my engineering Penelope keeps pulling my chairs apart, no matter your skill, hot glue and twigs do not stand up to a two year old!)
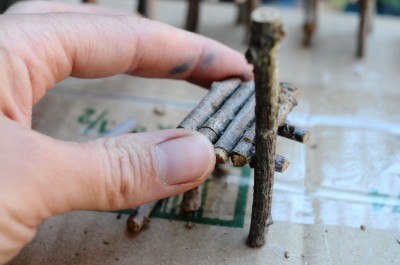
Stick those front legs on. You can see here how the front leg is supported at its top and side.
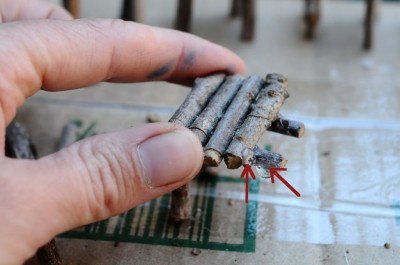
Flip the chair right side up and measure how long you want your back leg/chair back twigs to be and cut two of them. You can use straight twigs, or forky interesting ones. Put two drops of hot glue on for each leg, one on the back edge of the chair, and one on the side of the under-seat support, again, glue on two sides of the leg is better than one!
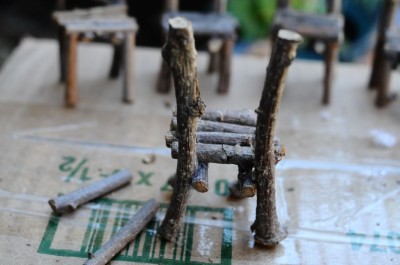
Here is the first back leg in position. When you hold the chair on its feet like this it is easy to slide the back leg to just the right height to make the chair seat level. Holding all the legs against a flat surface as you glue the back legs on will keep your chair from being wobbly like an annoying cafe table.
And here is the chair from behind with both back legs glued on.
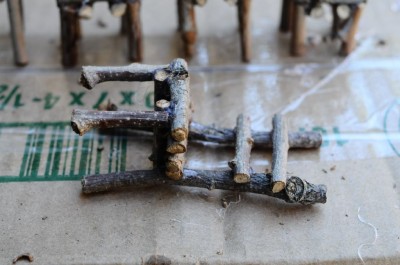
Lay your chair on its back and glue on the previously cut seat back twigs.
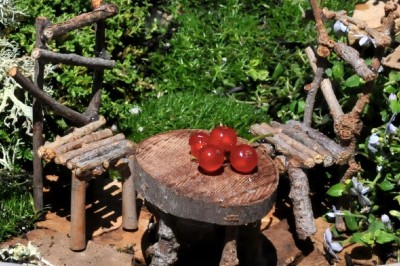
And you are done!
Next up, we make fairy gardens.

67 Comments
Add Yours →These are adorable! My kids will love this! They like to build fairy houses with twigs and bark, but haven’t been able to figure out a satisfying way to make furniture. This is a perfect start!
Thanks! Hot glueing twigs is pretty addictive. Check out The Magic Onions fairy garden series that is going on right now.
Seriously adorable! So pretty and simple! We need to go on a twig hunt, soon!
Yes, I’m sure Emma will have a lot of fun with the glue gun.
Wow, they are sooo cute!
Thanks so much! I love the cloth flowers in your blog header too!
Achei muito legal mesmos vc está de parabéns vou fazer também gosto muito Achei bom demais.djalma
What an informative tutorial on making those cute twig chairs. I am sure I’ll have to have some of these for my very next Fairy Garden! Thank you for the good explaination.
Thanks! I hope to see pictures if you do!
I just found your blog via Whip Up – these chairs are adorable!
Thanks, I didn’t know it had made Whip Up! 🙂
How very, very cool! They are precious and adorable. This is definitely going to be my next project. Thank you for sharing your art and talent. I especially am grateful for the easy to follow step by step instructions And photos!! Thank you so much, Amy
Oy, sorry I am so behind! I’m very glad that you liked these, and I hope they worked out for you!
so so cute!
Thanks! You can put them in the fairy garden you want to make now. 🙂
Oh my I have big klutzy fingers!!
I need fairy magic!!
Practice! Or perhaps start with a slightly larger chair.
My daughter and I just attempted to make a chair. I didn’t read through all the directions (shame on me) but our chair turned out to be a great bench! After lunch we plan to head back out and work some more on our fairy garden. I think I might actually make a chair this time.
Thanks so much for the tutorial!
You’re welcome! I love playing with our fairy gardens, more than my children it seems! Good luck.
I found your wonderful tutorial through Pinterest and a Fairy Garden Board. I will repin the image of your darling little twig chairs. I have a dollhouse and long been charmed by miniatures, but as a gardener, Fairy Gardens have captivated me. Without Pinterest I would not have found you. Love your work and spirit. Thanks for sharing your passion.
Thanks, I’m sure I should get more involved with Pintrest, it is lovely, but I am always going in too many directions already! I love miniatures and fairy gardens!
I’ve been making these for a workshop. I’m using elmer’s glue for the seat and stretchers across the back. glue gun for the legs. Birch sticks seem pretty and rather straight.
Fabulous! I would worry that since Elmer’s glue is water-soluble they would fall apart after too many night dews or a good rain? Have they been holding up?
That is a very good point. The chairs have not been used yet. I can’t stand the appearance of hot glue. I’ve gone over the Elmer’s with crazy glue. Again, because of the appearance, I’m applying it on the bottom side or back where possible. Gosh, lashings would be best, but everything tiny is a challenge!
You’re right, hot glue is really not part of the fairy aesthetic! And maybe the chairs should not be considered permanent, because as the twigs dry out and the bark on the twig loosens and the twigs shrink, they can all fall apart anyway. Thread lashing would work great, and I have done that for fairies before, but it does turn it into much more of a skilled project, and I originally designed this project for 5 year olds and their moms. You could try tiny little tack nails, that might work. Also waterproof wood glue. But frankly, I am not a big fan of the yellowy look of wood glue! And I think all glues will end up having problems with such an unstable material as twigs outdoors where they are going to shrink and swell with the weather. It’s a bit of a tough carpentry problem. Even lashing has trouble with shrinking and swelling sticks. What you really want is super tiny screws, but I think the next best thing might be a little bit of waterproof wood glue and some tack nails. Also important is picking twigs from tree species where you know they will hold onto their bark as they dry. Looks like you can actually buy mini wood screws from micromark, which is a great supplier of things for building tiny models.
Truly though, we should probably both just embrace that outdoor fairy furniture should decay with the weather, as all natural fairy things should do? Let me know how it goes.
[…] View The Tutorial […]
I love that you don’t hoard your “intellectual property” for yourself!
[…] Az elkészítést lépésr?l-lépésre képekkel illusztrálva itt találhatod – oneinchworld.com […]
This is awesome! I want to make my first “fairy garden” & this great tutorial will help me solve the furniture problem! Thanks for sharing.
Hugs, Renee
I’m glad you enjoyed it. Glueing twigs and rocks together is an easy way to get your fairy garden started. The Magic Onions have quite a few furniture tutorials as well.
[…] These would be great for a fairy […]
Thank you so much for such a great tutorial! I am planning on making some of these for a table centerpiece at my twins’ fairy tea party. (We need a spot for our fairy friends to sit too…)
Now if I can just find my glue gun….
Thanks! I hope they work out for you! Send me a picture, I would love to see your table! 🙂
[…] Tutorial […]
[…] Tutorial […]
[…] Fairy Chairs from One Inch […]
[…] Fairy Chairs from One Inch […]
[…] Source […]
Lovely little pieces. Made lots of these to sell but I wired them together, much more work! Love how these are so quick to make. Will do some for my plants.
I’m sure they last much longer when you wire them together though! Hot glue and twigs is not exactly a long term solution.
[…] Twig Chair Tutorial […]
[…] One Inch World, so all the credit goes to her. Just check out her super adorable felt armchairs or wooden twig chairs. S-O-O-O C-U-U-U-T-E! Similarly, I fell in love with her felt salad leaves the first time I saw […]
[…] 0.4-0.6 cm) thick twigs. We dried them for a week, followed Katherine’s very detailed DIY twig chair instructions, and came out with the little cuties that you can see above. I am so in LOVE and they make me smile […]
[…] 4. Twig Chair […]
[…] the Little Cuties series. Recently I wrote about the super cute Twig Chairs that Katherine from One Inch World introduced to us so wonderfully. When I was done with the chairs, I could not stop and simply had […]
Hi – I loved this project! So much so, that in a recent blog post of mine, I featured it. I couldn’t find an email to contact you directly to share the link, but I have left the URL in my website link if you are interested. Thank you for creating such a wonderful resource and recipe!
[…] adorable! So pretty and simple! I need to go on a twig hunt, soon! They are precious and adorable. More directions here. PolyTunnel This is a great tutorial. What a great little greenhouse and super tips on growing […]
Thank you, you have saved me pennies
[…] 14. twig chair. My kid’s fairies sit on cork and rock benches in their fairy gardens, but more dignified fairies would undoubtedly prefer this lovely twig chair. […]
[…] twig chair. My kid’s fairies sit on cork and rock benches in their fairy gardens, but more dignified […]
DANKE!! für die tolle Idee ich habe mich sehr über Deinen Betrag gefreut!!! :):)
[…] and heavy duty, but was not impressed with what i could find available to buy (for example, this. Twig chair tutorial one inch world. These are adorable! My kids will love this! They like to build fairy houses with twigs and bark, […]
[…] plans. We show you how to build a wooden chaise lounge chair, using common materials and tools. Twig chair tutorial one inch world. These are adorable! My kids will love this! They like to build fairy houses with twigs and bark, […]
Thanks so much for this great tutorial – just made twenty of these for my daughters fairy party – they are sooo cute!
Thanks for the step-by-step – it was really helpful! I’m working on my first fairy garden. Here’s how my chair turned out: (via my twitter) https://twitter.com/bridey_/status/766030800911339520
I added a couple more sticks to the back to give a firmer look. Turned out cute enough for me! 🙂
Thanks for providing your post and your work is so fast regarding furniture and specially chairs provided with in one hours for you time is very precious its very good thing for customers
?????? ????!
????? ????? ?? ??????????, ??? ?????? ???????, ? ????????? ??? ??? ?? ????????, ?? ???? ?? ?????? ?? ??????????? ??????, ???? ? ????? ?????? ????? ??????????!
?????? ?????? ?? ??????? ? ????????? ?? ????? ???? ?????????????, ??? ????? ????? ?? ?????????
[…] you can make these twig chairs from One Inch World in just a few minutes, using sticks from your own […]
I see you don’t monetize your blog, don’t waste your traffic, you can earn extra
cash every month because you’ve got hi quality content. If
you want to know how to make extra $$$, search for: Boorfe’s tips best adsense alternative
[…] a box car event how to build a wooden swing set do it yourself blueprints online how to build. Twig chair tutorial one inch world. These are adorable! My kids will love this! They like to build fairy houses with twigs and bark, […]
[…] course your fairies may be tired from their long flight, and this tutorial for DIY fairy garden twig chairs will solve that problem pretty easily. Especially with the very detailed, step-by-step directions […]
[…] These DIY fairy garden chairs look so adorable. To build these you need some basic supplies, a handful of twigs, pruning shears or other clippers or saws, and a glue gun.Source/Tutorial: oneinchworld.com […]
[…] What do you want to make? A table? A bed? A sink? A bath? What will your fairy or gnome need? Twig chairs, a swing, an acorn birdhouse (scroll down), a bird’s nest? […]
[…] What do you want to make? A table? A bed? A sink? A bath? What will your fairy or gnome need? Twig chairs, a swing, an acorn birdhouse (scroll down), a bird’s nest? […]
[…] are the most magical – make it look like fairies really live and play here! You can make small furniture from twigs and bark, or simply arrange rocks to look like a seating area. Pebble pathways […]
[…] Source: oneinchworld.com […]
[…] Mini Chairs […]