This is the funnest way to make a felt bowl there is. That I know of. It combines art project with physical sport, and is kind of silly.
What you need, a foam ball, roving, rubber bands, soapy water, scissors.
I’ve tested several different kinds of balls for this, and the foam balls works best for several reasons, the spongy nature helps keep the felt wet, it lets the wool shrink as it felts, and it is important that your ball can squish so that the inner layers are properly mashed around. With a rubber ball the felt dries out too quickly (although I experimented with wrapping the whole thing in plastic wrap and lots of packing tape, that shredded off too quickly, and was just a mess.) With a hard plastic ball (even those ones with lots of holes) the inside of the bowl doesn’t felt very well, because there isn’t enough agitation, and the wool can’t shrink the hard plastic. With the foam ball the difference in size between what you start with and what you end up with can be pretty dramatic. The wool also sticks very well to the foam surface which makes it easier for kids to wrap their ball.
How to make a felt ball/bag/container:

The foam balls I used are intended for kids learning to play tennis, they seemed pretty sturdy and I can get a lot of them relatively inexpensively at Target. They are about 3.5″ in diameter.
Get some roving, break it into sections about 3 feet long and split each piece into four narrower strips. We used 5-6 strips for our balls.

Wrap your foam ball, don’t leave any holes, wrap in lots of different directions so the roving criss-crosses, and keep the roving fluffed out flat – don’t twist it up, it won’t felt as well that way.
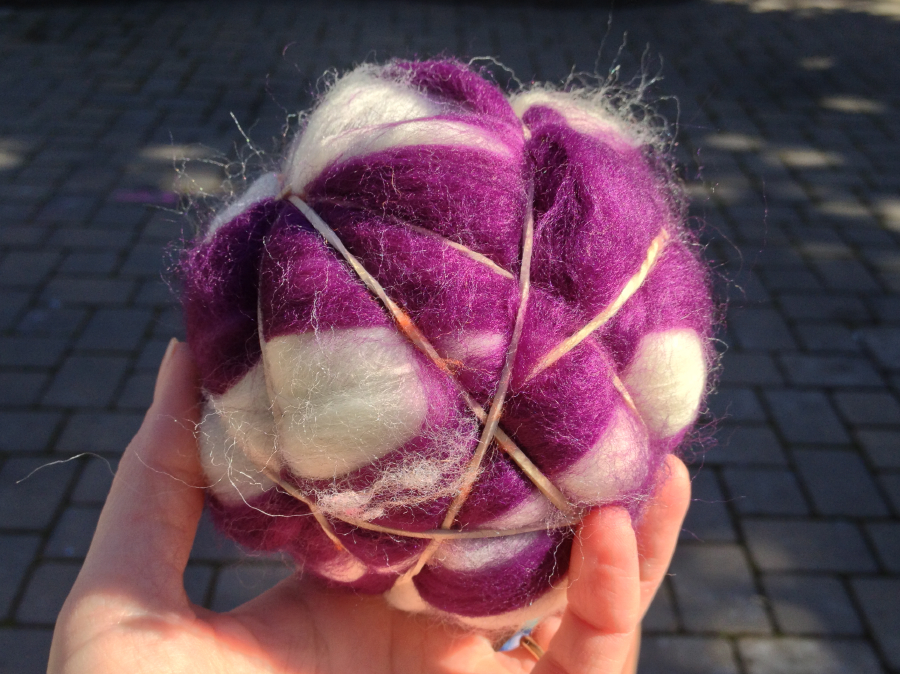
Gently wrap your wool and felt ball in rubber bands to hold it all together. I used 7 for a 4″ ball. More is probably better.
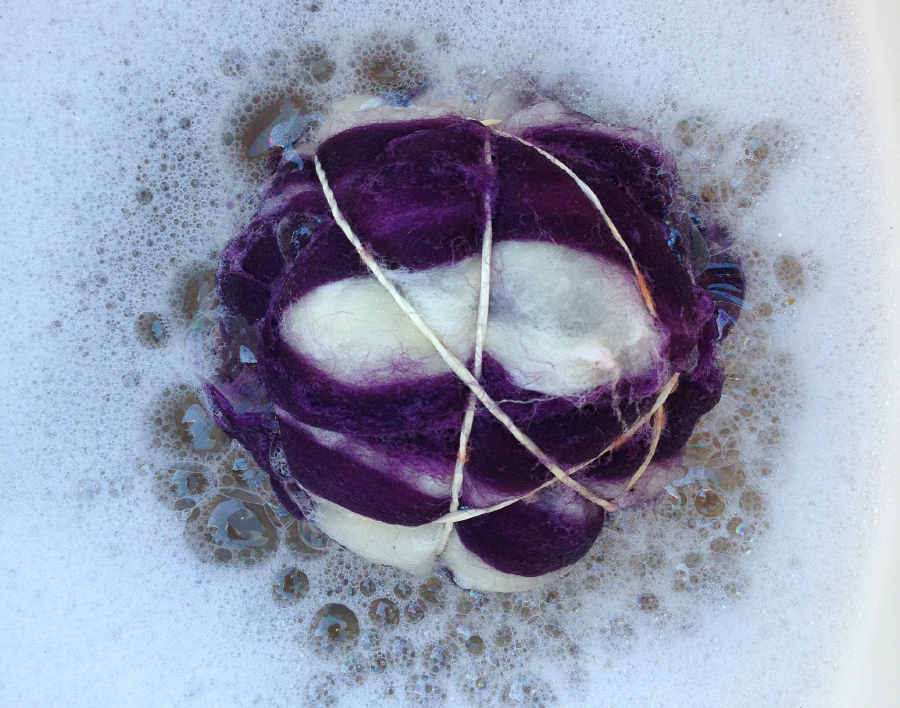
Get your ball good and wet.
Start felting by tossing your ball from hand to hand and rubbing gently. Move to progressively more aggressive activities, bowling the ball along the ground,
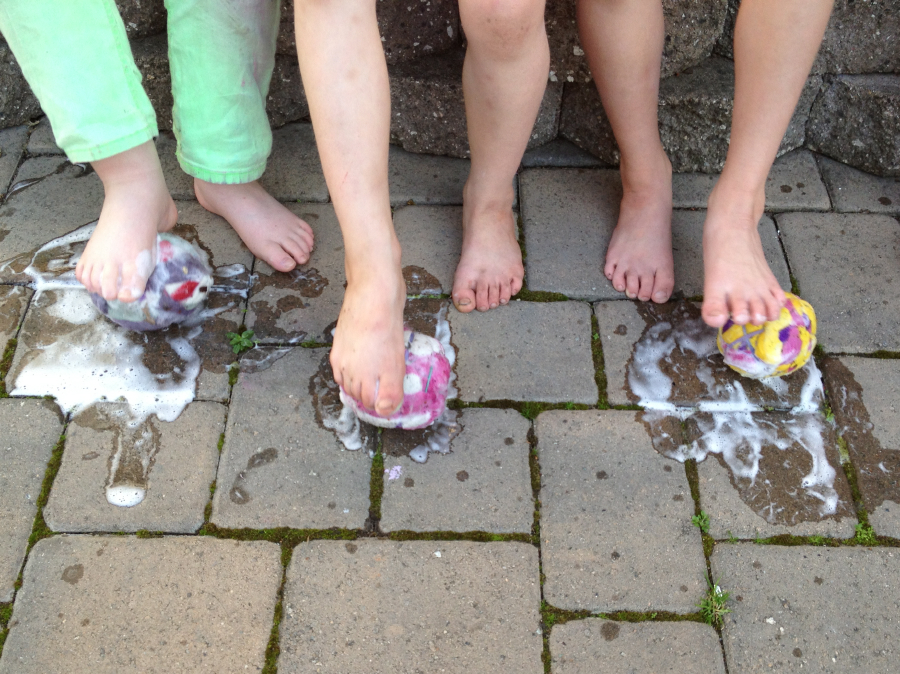
rolling the ball under your foot,

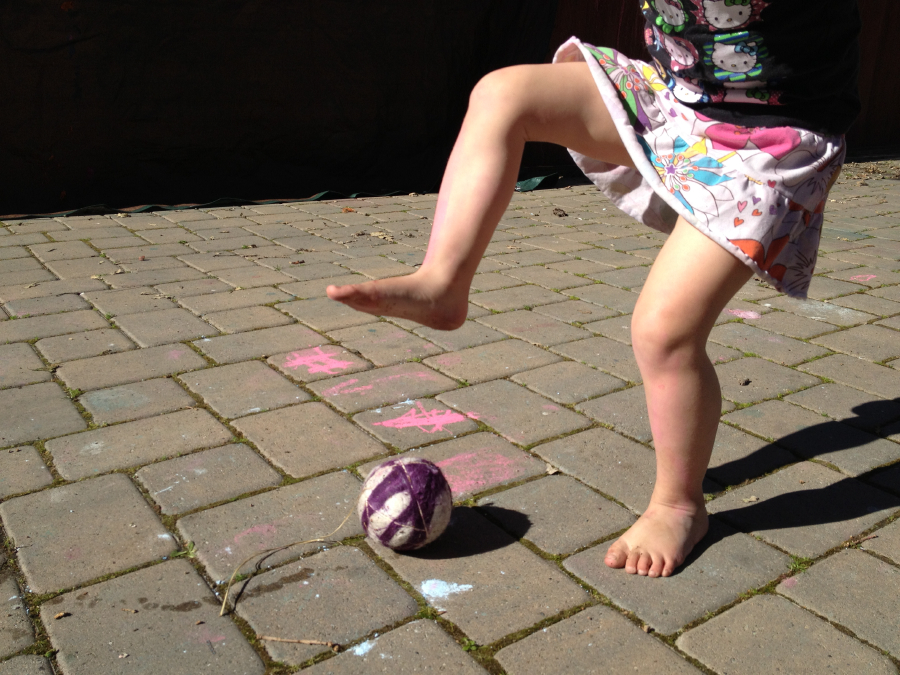
kicking the ball against a wall or with a friend,
jumping or stomping on the ball.
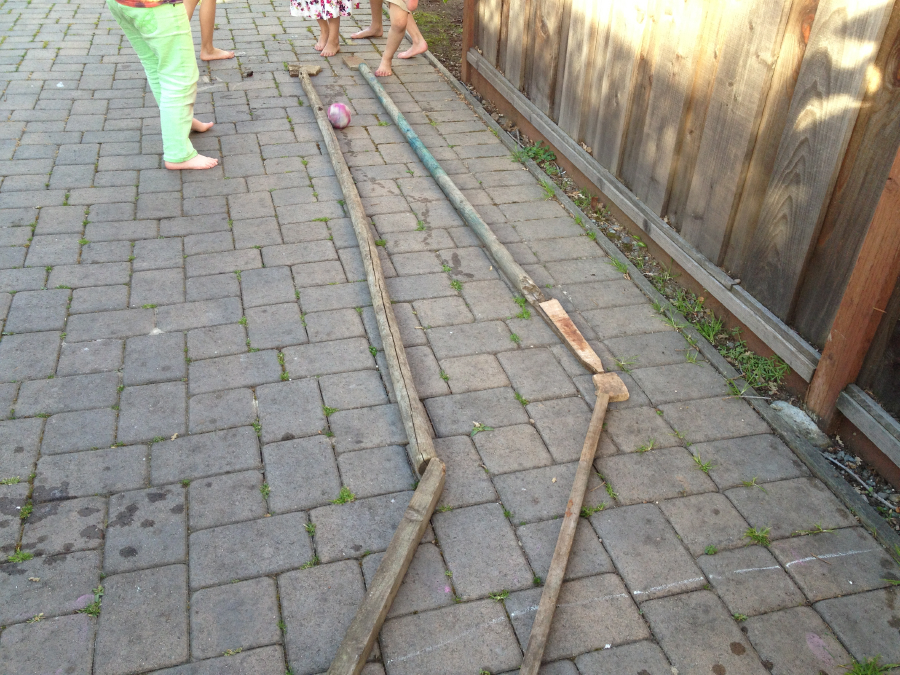
The girls came up with some fun mini golf courses and other games to play with their balls.
The most ‘efficient’ way to felt your ball is to roll it under your foot, the squeezing action helps felt the inner layers, and you can progress from gentle rolling to quite firm rolling as your ball starts to felt together. But the most fun is probably whacking it across the yard when it is soaking wet and splatting it everywhere.
When you ball starts to get a little dryed out out squeeze it in the soapy water again, dry wool doesn’t felt as well.
After 20 minutes to an hour of hard play your ball will feel stiff, and when you try to pinch up the fibers they will hold together. Now it’s time to try to get those rubber bands off! Some of them may need to be cut and pulled out. I wrap my hand in my sleeve when I do this, because when they break free they snap pretty hard! You might want to try taking your rubber bands off after every 5 minutes of felting and move them around to keep them from getting too stuck in the surface of the felt. Or you could try wrapping the whole thing in plastic wrap and packing tape and rubber bands and maybe some cement. Not that last.
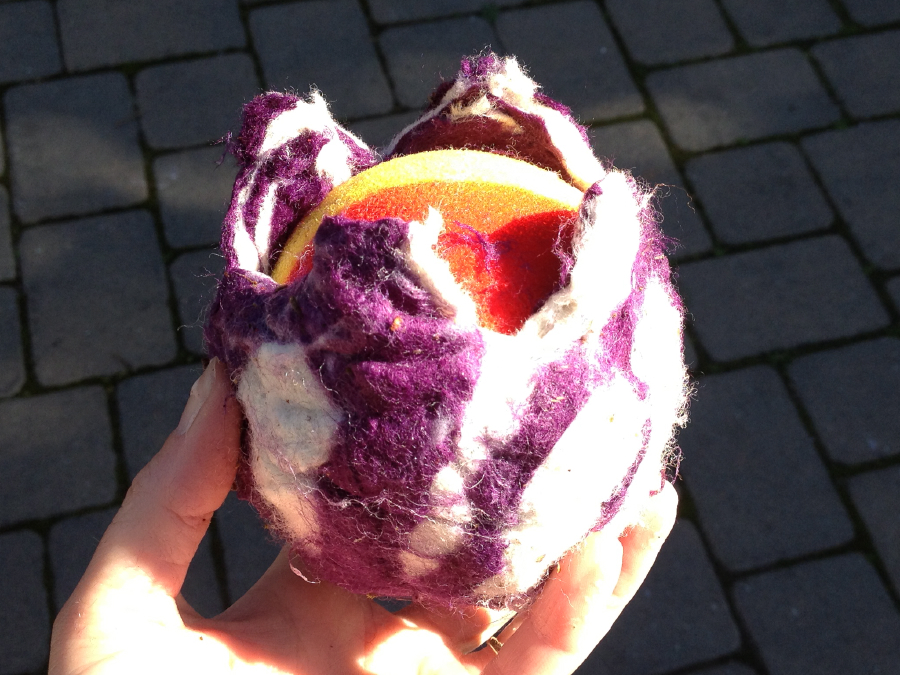
After you get the rubber bands off you can cut into your ball. Cut a small cross just big enough to squeeze the ball out through. Put your fingers in the hole and slide them around, separating the ball from the clingy wool. Squeeze the ball out the hole. Try not to destroy the foam ball in the center, these can hopefully be reused several times, although if you felt your ball very aggressively the felt may have permanently adhered to the surface of the ball, destroying it when you try to take it out. This takes at least an hour of concentrated adult effort though.
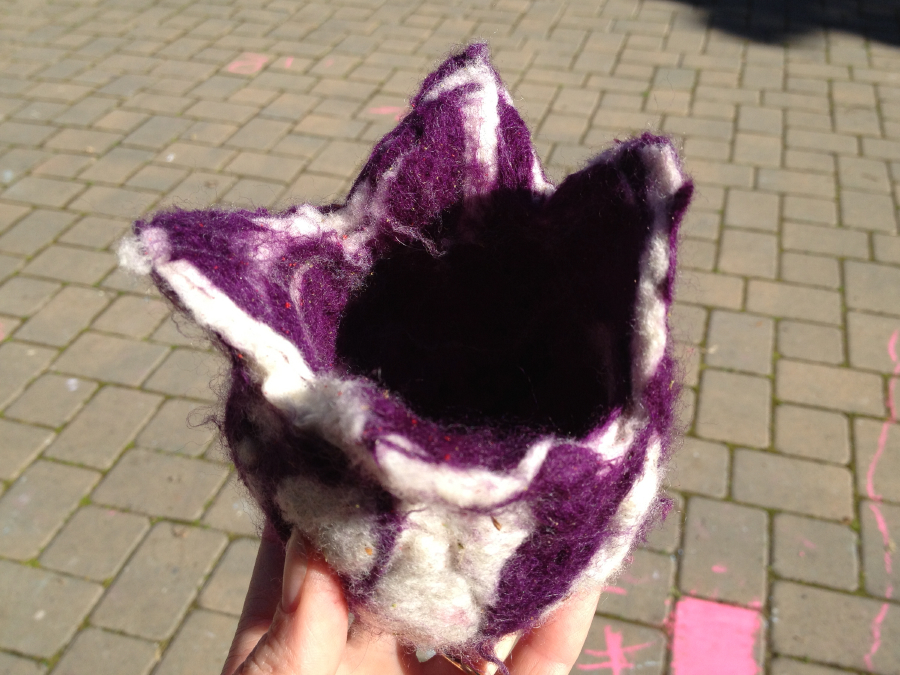
Once you have your ball out you have several options, (which I don’t currently have documented! Drat!) You can leave it as is. You can run it through the washing machine (possibly in a lingerie bag.) This will further felt and shrink it, to 2/3 or 1/2 its size depending on how felted it already is. You can tie a felted cord onto two of the points to turn it into a bag. You can further trim the top however you would like. I meant to get lots of pictures of this at our art group today, but somehow, by the time we got to that point I was exhausted and out of my head! I will try to amend this post tomorrow, but I already promised my class I would have the ‘instructions’ up this morning. But of course I am late.


3 Comments
Add Yours →Now this is a version of wet felting that I could get into! We tried the more traditional version a year or so ago, and it just didn’t go very well.
Can you tell me where to get a foam ball? Your ball looks like a tennis ball but you said it is squishy. Thanks.
[…] For Week 4 (Felting Project): […]