Peg Dolls & SF Cherry Blossom Festival Post date April 22, 2011 Posted in Art Activities Tagged with fabric, holiday, wood Comments 4
St. Patrick’s Day, Pattern Tester Please Post date March 19, 2011 Posted in Crafty Tagged with holiday, pattern, sewing Comments 6
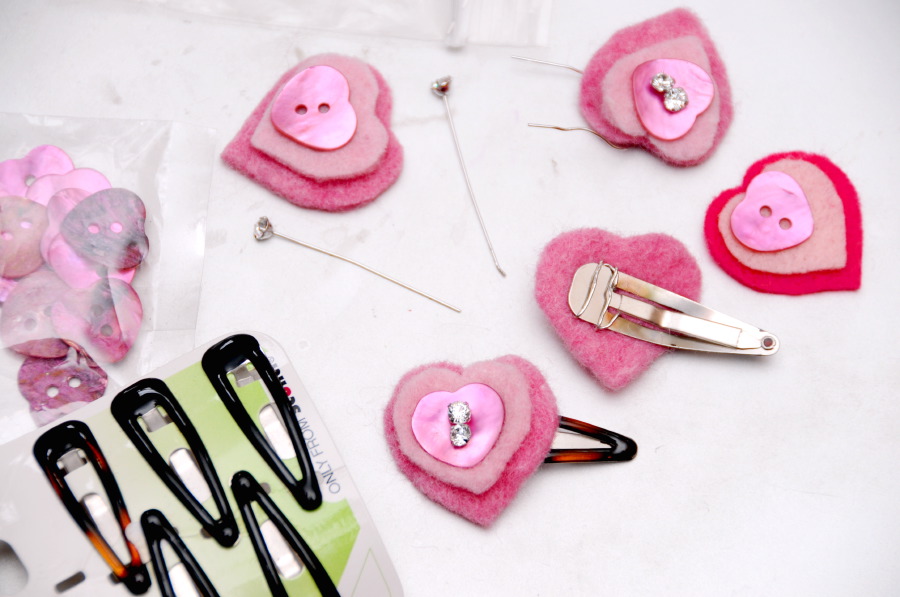
No Sew (No Glue) Heart Barrettes Post date February 23, 2011 Posted in Crafty Tagged with barrette, Crafty, felt, holiday, tutorial Comments 4
Gingerbread Marble Run Post date January 8, 2011 Posted in Crafty Tagged with Crafty, food, gizmo, holiday Comments 7
Glowing Play Pumpkin Post date October 21, 2010 Posted in Crafty Tagged with Crafty, felt, halloween, holiday, paint Comments 3
Giveaway Closed Post date October 16, 2010 Posted in Life Tagged with accessory, barrette, felt, giveaway, halloween, holiday Comments 0