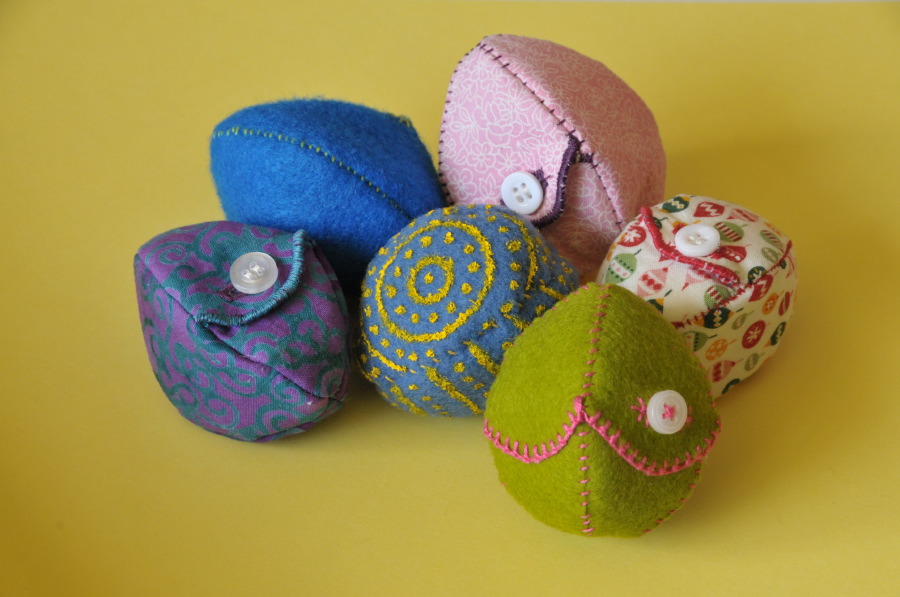
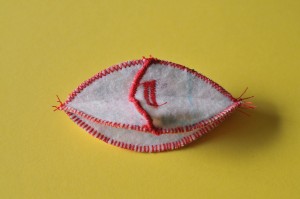
Eggs eggs eggs! I’ve been experimenting with soft hollow eggs to stuff for Easter, I don’t like plastic eggs. If you don’t like plastic eggs either, then whip up a bunch of these to hide around your house, or just make a couple to put in a basket.
I can’t say I’ve gotten the pattern quite right yet, but it’s almost Easter, so *ding* time’s up. Maybe I’ll work on these some more next year. The two main caveats are they are pretty crushable, and the opening is small. They will hold their shape fine if you stuff them with paper grass and candy, but if you just want a couple jellybeans rattling around you can squash them flat if you don’t treat them gently. I’d also like the opening to be larger when I redesign them, but the larger the opening the less stable they are. My friends tell me the small opening is an advantage for entertaining little children anyway.
So there you go. There are lots of variations you can make with these, how many different prints do you have in your stash? You can practically fit this pattern on a charm square, actually, you probably can. The initial instructions call for embellished felt, but at the end is a variation for (heavy) interfaced fabric, and the button is also optional if you’re in a rush and you want to make a lot.
So download the Egg_Pattern and get started.
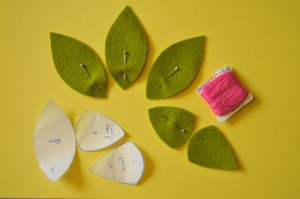
Cut out your pieces, marking which end is the bottom because they are easy to get upside down. Cut three leaf shaped egg-quarters, and one each of the half pieces for the fourth side that opens.
You can paint or bead or embroider or otherwise embellish your pieces now, or you can do it when the egg is mostly sewn together if you want a pattern that matches up nicely at the seams. Remember that you’re going to need to cut a buttonhole in the top piece of the split side and sew a button on to the bottom of the split side (although you can skip this). You don’t want to have to cut through any of your decorative stitching to cut your buttonhole.
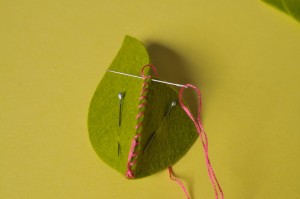
I’m going to whip stitch the egg together from the inside/with the pieces wrong side together, then when I turn the egg right side out the seams will be smoother than if I whip stitched them from the outside or used a blanket stitch on the outside.
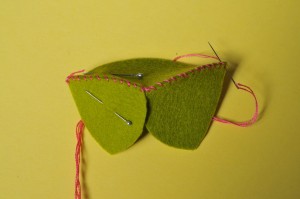
Take one egg-quarter and the bottom of the split side and match them up at the bottom points. Take two stitches through the bottom corners, then whip stitch up one side. When you get to the upper edge of the split bottom piece take two whip stitches through the same spot to reinforce the edge of what will be the opening.
Then match the top piece for the split side up with the egg-quarter and continue whip stitching up the seam, again taking a double stitch at the bottom and top to hold it in place neatly.
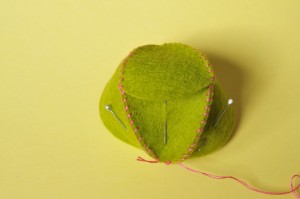
Take another egg-quarter piece (making sure not to mix up the bottom and top) and whip stitch it down the other edge of the split side. Now you should have three sewn egg panels with an opening flap in the middle panel.
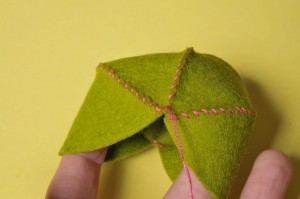
Sew on the fourth egg-quarter piece. Bet you weren’t expecting that.
Now, while your egg still has one open seam, is the time to finish the edges of the opening flap and the button hole, and to sew on the button, and also to add any other embroidery. Once you finish sewing the egg shut getting inside it becomes much tricker. You still can through the flap opening, but it isn’t very roomy.
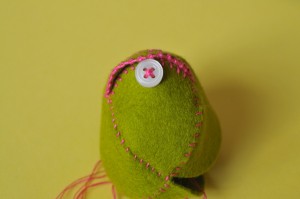
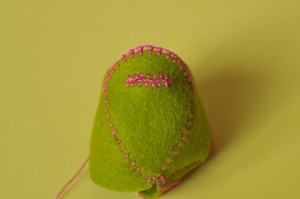
Start by turning the egg right side out, then stitch around the opening. This will help the felt hold its shape, but if you’re in a rush you can skip it, felt isn’t going to fray on you. You can use any edging stitch you want, a plain button hole works great. I went a little fancy-pants on this egg and used an Antwerp edging stitch.
After your edge stitching is done around the opening stitch on the button. You want to put it close to the edge so that the buttonhole on the top piece doesn’t have to go too close to the edge.
Once your button is in place smooth out the egg shape and feel where the button lies behind the top flap. Mark the middle of the button, and cut a slit for the buttonhole slightly longer than your button diameter. Push the button through to make sure the buttonhole is long enough. Now you can edge stitch around the button hole, or you can leave it plain.
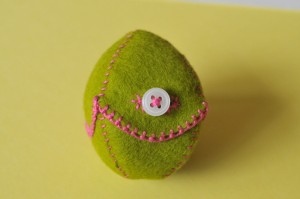
Like I said before, now is the last convenient chance to add any embellishing embroidery. For this egg I continued the scalloped row of Antwerp edge stitching from the top flap around the other three sides of the egg. I just learned this stitch for this egg, and I wanted more! 🙂
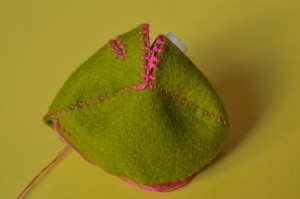
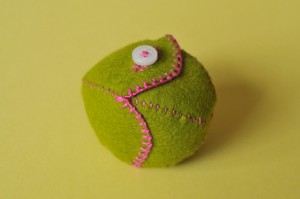
Finally, turn your egg back inside out, whip stitch the fourth seam closed, and then turn it right side out through the flap opening. Push the seams smooth with your fingers. Now you have a pretty egg, that isn’t cheap plastic, that you can fill with treats for Easter. I’m going to hide mine around the house for my daughter, but I love them too much to hide them outside. Maybe next year after they’ve been ‘loved’ until they’re shabby.
Fabric Variation
If you aren’t into felt right now, or you just want a little variation, you can make a quicker version of this egg using fabric and heavy interfacing. I’ve included a version of the pattern that has 1/8″ seam allowances added to it, and you can put it together with a zig-zag stitch (or straight if you feel like it) on your machine. The directions are primarily the same, with a few exceptions.
Cut out all the pieces except for the top of the split side. Cut this out roughly, or not at all, then use your machine to sew a buttonhole approximately in the right spot. Once you’ve sewn the buttonhole then you can position the top split side pattern piece with the button hole near the bottom edge and cut it out. I do it this way since when I sew machine buttonholes they never come out exactly where I want them.
Also, after you have the top and bottom split sides cut out but before you’ve done any construction sewing is the time to finish the edges of what will be the egg opening with a zig-zag stitch. You probably want to run a line of straight stitches very close to the edge before the zigzag to reinforce the edge and keep it from stretching and curling when you add the zigzag.
Once you’ve ‘finished’ the top and bottom pieces of the split side the construction instructions are the same, using a machine zigzag stitch covering 1/8″ of the edges rather than a hand whip stitch.
After the construction sewing is done and you turn the egg right side out and flatten the seams out with your fingers, mark where the buttonhole lies on the bottom of the opening, and sew your button on. There you go.
As always, please send me a link if you make some of these.


36 Comments
Add Yours →[…] plastic eggs this Easter you should definitely check out these fillable fabric eggs from One Inch World. They may be a little more work up front, but you can use them year after year…and they look […]
Love these eggs! What a fabulous alternative to the plastic ones. I’ve linked to your tut my blog!
What a fun idea! I’m hosting an Easter kid craft Jamboree over at my blog, Kiddio, and I’d love to be able to include your post. Come check out the details at:
http://www.kiddio.org/2009/03/announcing-kid-craft-jamboree.html
Or go here to sign up:
http://www.kiddio.org/2008/01/jamboree-1-submission-form.html
Hope to see you! Thanks 🙂
Amanda @ http://www.kiddio.org
[…] Look at these eggs by One Inch World! They’re small, they’re fabric, and they’ve got a little opening you can use to fill them with tiny little treats. Get the tutorial. […]
Very cute!!! I posted a link to your tutorial on Craft Gossip Sewing Blog:
http://sewing.craftgossip.com/tutorial-fillable-fabric-eggstutorial-fillable-fabric-eggs/2009/04/03/
–Anne
Brilliant – thanks for the tutorial!
Your blog is adorable. Things in miniature are the best! Thank you for your great ideas! 🙂
Great idea! I do an Easter egg hunt with my girls each year. Wish I would’ve found this earlier, this would’ve been so much better than those plastic ones. I’ll have to keep this in mind for next year!
[…] cute-and-clever fabric eggs are the brainchild of One Inch World which has some great felt-crafting ideas. To get the specifics, surf on […]
I love this little cutie-patootie craft! Thanks especially for including both the hand-sewn and machine versions. I liked it so much I included it on my CraftTestDummies.com blog this morning, crediting your genius, of course! Happy Crafting!
[…] Klicka här för att ta er till tutorialen >> […]
I saw ’em, loved ’em, made ’em. I wish I had more hours in my day.
Thanks for the tutorial!
http://mountainmamaknits.blogspot.com/2009/04/i-was-clicking-all-over-internets.html
Hi there! These are so clever and a way to avoid buying character-less plastic eggs. (And you have to have SOMETHING to fill with tootsie rolls =) ).
I wanted to talk to you about the possibility of a Guest Feature at our website. Let me know if you are interested!
Stopping by from the Jamboree and I think these are awesome!
We don’t eat chocolate much so having something like these that I could fill with other treats would be perfect!
thanks for sharing!
I love those !! Thank you for the idea and for the tuto ! I still have a few days before D-day.
I discovered your blog through Craft Gossip and I like everything about it. Carry on !!
(Do you mind if I put a picture of your eggs on my blog with a link to yours ??)
How fun to see that you visit my blog 🙂 I just love your eggs 🙂 I hope it´s ok for me to link to your tutorial. I am going to sew from your pattern this weekend 🙂 They are perfect for giving away small eastergifts.
Have a happy easter from Sweden!
Just love these eggs! Thank
you so much for the wonderful tutorial.
Have a wonderful Easter with your family show us your little one opening her egg.
hugs ginger(lovestodream)
These are really cute. I know what you mean about plastic eggs. I tried making some paper ones that I could hinge and open and close. It kind of worked, but these are a much better option.
Wonderful idea. I bookmarked this for next year.
I came here from Craft Gossip.
Love your site. I’ll be spending many happy hours looking and making items from your siet. :0)
I’m thinking about making these eggs for a felt play food set, with an sewn felt egg inside that the kids can use in their kitchen! How great!
[…] en el centro de la mesa como esconderlos alrededor de la casa para que los chicos los busquen. One Inch World te enseña a […]
These are very cute! I wish I had seen them a couple of weeks ago, but perhaps for next year. I’ve posted a link. Thanks for sharing!
Thank you for sharing! We are military and currently live overseas and all of the on base store are sold out of plastic eggs! I’m actually glad they are or else I would have never found these! Thanks again!
I’m glad you found it too! If you want them to stay chubby like the plastic ones they do need to have some kind of easter grass inside them. Good luck, and let me know if you have any problems!
Beautiful! I haly ever leave comments, but I just love these so much! Getting into felt now that I have a little boy and this is just what I wished for. I found this via pinterest. Thank you so much!
Thanks so much! I really liked making these, although they are a little on the floppy side but quite pretty. If you want something sturdier we made some that were wet felted around mini easter eggs, and those are solid and quite bouncy. http://oneinchworld.com/blog/index.php/2009/04/hollow-wet-felted-eggs/
thank you for all the free tutorials! Proof that there are good and selfless people in the world!
I’m hardly selfless, but thanks. 🙂
[…] could make your own eggs! There are plenty of gorgeous options from these little felt eggs (from the very creative One Inch World) or you could even make old greeting card […]
Good morning Katherine (at least it is morning here in Germany)! Just a quick comment to let you know that I have used your pattern http://frederiqueandfriends.blogspot.de/2013/05/mother.html
I used the size meant for the fabric egg (needed it to be slightly bigger) and I also made them inside out, this way they don’t look too “eggy”. Thanks for sharing the pattern 🙂
They are lovely Fred. If they weren’t meant to be eggs I wonder what the simplest way to increase the size of the opening would be? I remember it was very tiny to keep things egg-like. I hope they were useable as something other than eggs!
Increasing the size on a word document (or open office) is really not difficult as long as one keeps the ratio, I guess I could have done it to make them even bigger. I just didn’t think about it at the time ^^
The pin-cushions http://frederiqueandfriends.blogspot.de/2013/05/pin-cushions.html did fit inside although it wasn’t so easy to get them out again! I think they can be used as a coin purse for instance.
[…] risultato è molto chic; che dire poi delle uova realizzate con vecchie stoffe, piuttosto che delle uova che si aprono dove poter nascondere un piccolo regalo. Insomma, tante idee fai da te per decorazioni pasquali […]
[…] of plastic Easter eggs? Check out this fill-able fabric Easter egg tutorial from One Inch […]
[…] Plus they look really simple, even if like me, you’re not a big sewer – see the Fillable Soft Egg Tutorial at the clever One Inch World […]
[…] cloth eggs: You can buy or make your own fillable cloth eggs, if you’re feeling crafty. These are great if you have little kids because they can’t […]