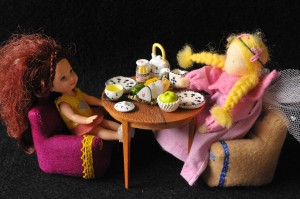
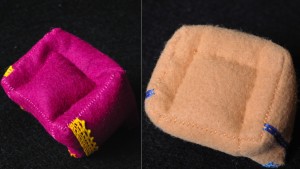
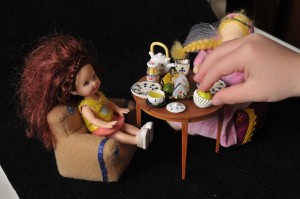
Do you know a little girl who needs more places for her dolls to sit? Maybe you? We had four place settings for our doll tea time, but only three chairs, so I made up the pattern for these chairs to fix that tragic shortcoming. Really tragic, one of the dolls had to sit on the sofa. Oh noes. But now, now they all have chairs.
I wouldn’t call this a beginners pattern, but there’s nothing terribly complicated about it either. The hardest part is keeping things lined up as you sew down the seams. As long as you mark the points that need to line up with pins or tailors tacks or pen or whatever, you should be able to get this to come together.
-
Materials:
- 7.5″x9″ piece of felt
- same size fusible interfacing if you are using thin (craft) felt
- matching thread or embroidery floss
- stuffing
- beans or rice for weighting the bottom
- embellishments: 1/8″ ribbon, lace, embroidery floss, beads, paint, whatever you are into.
I designed the arm pieces of this pattern specifically so that I could run a ribbon from the inside of the arm to the outside in one piece, but if you want to use a fabric (that ravels) rather than felt you would have to move the top and inside arm pieces to extend out to the side, so that you could add a seam allowance (there isn’t any room for one in the notch leading up to mark C). Or you can use this pattern, fuse interfacing to your fabric, and cheat the seams that you can’t add interfacing on a little bit. Can you tell I am a ‘patterns are just a guide’ kind of person? If you’re going to take the time to sew something, make it yours.
Really there are a lot of things you could do with this, you could slice it down the middle and add a couple inches in, that would get you a couch! What I’m really tempted to see is someone (me?) scaling this up to feet instead of inches and making a toddler chair out of it. I bet it would work just fine with decorator weight fabric and good sturdy thread/yarn to hold the seat corners to the bottom of the chair. There’s a challenge.
So download the pattern and get started.
Prep/Cutting
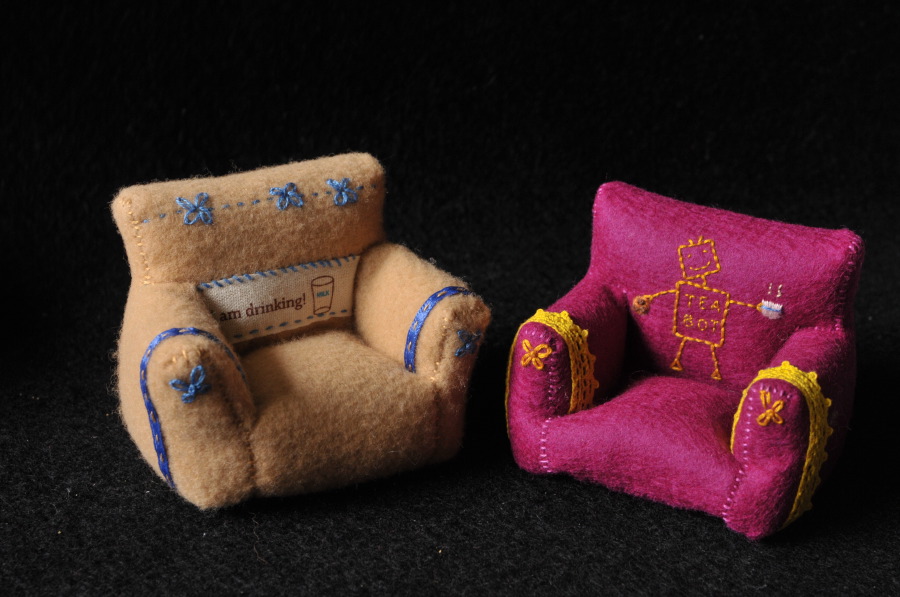
If you have a nice sturdy piece of felt, 100% wool or just heavy craft, you are all set. If you have a standard piece of craft felt that stretches when you peel the sticker off of it, then you need to add some interfacing. The purple chair is just wool felt, but for the tan chair I used light fusible interfacing, crossed my fingers and ironed from the interfacing side at a temperature hot enough to melt the felt. (My interfacing directions specify the wool heat setting). Everything survived. (Although that might have something to do with why the craft felt chair mysteriously turned out slightly larger than the wool felt chair, or maybe I just stuffed it harder.)
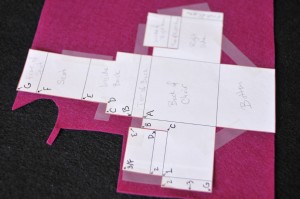
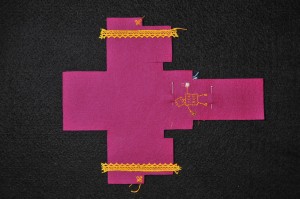
So, once you have your felt prepped, cut it out along the heavy red lines of the pattern. This is mostly the outline, except where it dips in at mark C. I tape my pattern down rather than pinning because it keeps it both flat and in one place. And the tape comes off the felt easily. Things always seem to go wrong when I pin patterns.
Embellishments
Now, before you do any of the construction sewing, is the time to add your embellishment details, while the piece is flat and easy to work with. I’ve sketched my embellishments for the tan chair onto the pattern in white, but you should work something out for yourself, or leave it blank if you’re going for a modern non-fussy chair. The locations are pretty standard, medalion on the front of the arm, over the arm stripe-ish bit, some decoration on the back, but you could put flowers all over, or use the back (front or back of the back) as a canvas for any scene you would like.
Embellishment ideas:
You could bead the lazy daisy flowers at the ends of the arms, change it to a simple circle or square for a more modern look, applique a simple felt shape, pin in a vintage earring, or sew on a small button…
For the ribbon detail over the arm you could embroider something instead, a chain stitch, or zigzag, or any fancy linear stitch, like a threaded herringbone stitch (I think this would be great across the back), fly stitch, twisted chain stitch, line of cross stitch, Portuguese stem stitch… You DO have a vintage copy of Coats & Clark’s Book No. 150: 100 Embroidery Stitches (35 cents), don’t you? This is a great chance to show off your favorite, possibly obscure, traveling embroidery stitch. Anything to make a fancy line. If you don’t like the straight line you could twist it so that it drapes over the arm and flows around the back and up over the other arm.
On the seat back, anything goes. I started with a simple running stitch and flower motif across the back of the tan chair, but if you want some really large decoration on your chair, this is the place to put it. An embroidered house, a dog, a rocket or robot, teacup, cupcake… who is the chair for and what do they love? On my first chair I had that adorable ‘I am drinking’ ribbon, and I really wanted to use it on something. So I did.
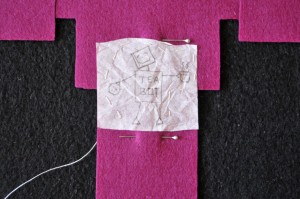
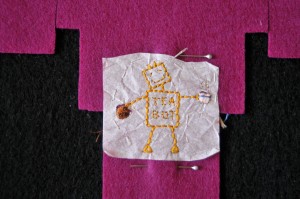
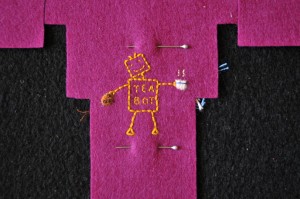
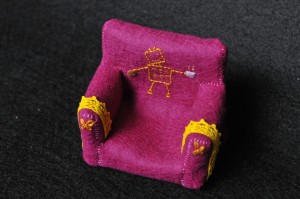
For my second chair which I’m photographing for this tutorial I decided on a tea robot. Here’s my embroidery process if you care:
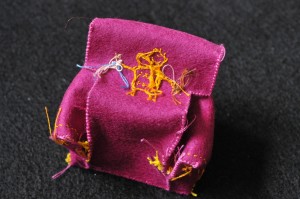
I drew a robot pattern on a piece of tissue paper, and placed it on the inside back section of the chair. I stuck a pin at the top and bottom marks of that section so I would be sure to get it in the right place. Then I basted it down with thread to hold it in place.
I embroidered the design…
… then pulled off the tissue paper.
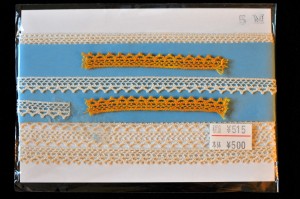
For the over the arm detail I wanted to try using lace for my second chair, but I didn’t like the look of the white lace along with the yellow embroidery. Or maybe I was just procrastinating writing this tutorial. Anyway, I decided that the yellow embroidery floss I was using for the robot was pretty much turmeric colored, and decided to try turmeric dying. It only took me 20 minutes for the boiling in turmeric, rinsing and ironing dry, and it came out the *exact* same color as the floss. I couldn’t see the stitches I made holding it down. Unfortunately it has actually changed color quite a bit since then, lightened up from orangey yellow to yellowey yellow, you can see the stitches quite clearly now, so I’m glad I made them mostly small and even. 🙂 I’m still exuberantly pleased that my tea robot chair has turmeric dyed lace that I found in a second hand craft bookstore in the Jimbocho district of Tokyo. Woo. And now I have this desire to go around dying everything in my house with turmeric…
To finish the embellishments I added the same lazy daisy flowers as on my tan chair, although I’m not really thrilled with them. At the time I couldn’t think of anything else, maybe bolts? Or tea cups. Yep, shoulda been tea cups.
Time to get out of Flatland.
Construction
For the seams, if you want square corners you can use a regular blanket stitch on the outside of the seams, for softer corners I use a blanket stitch on the inside of the seams. Actually I don’t use a blanket stitch, I use a bastardized blanket stitch where you put the needle in through the other side of the loopy bit… after extensive searching (It is soooo hard to look up embroidery stitches when all you know is how to do them, isn’t it?) it looks like my stitch is a stretched out plaited buttonhole stitch. It is much more knot-ish than a straight blanket/buttonhole stitch and I find it holds things together pretty well. But there is nothing wrong with using a straight whip/overcast stitch, that will work fine too.
For these seams it is helpful to mark your folds where they line up with the corners, and when going around a corner take two stitches in the fold around the corner to the same point in the tip of the corner, if that makes any sense. In other words, the last stitch before you come to the corner goes into the tip of the corner, and then the first stitch after you fold the felt around the corner also lines up with the tip of the corner. Or just ease things so all the marks line up and it will all work out fine.
Seams:
* Match up the numbers and sew from 1 to 2 to 3. This is a short seam closing the end of the arm. Do this for both arms.
* Next sew the alphabet seam, A-G, once on each side. Keep those letter marks lined up.
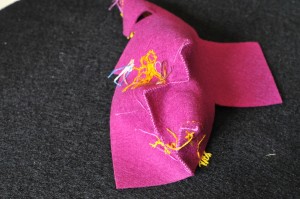
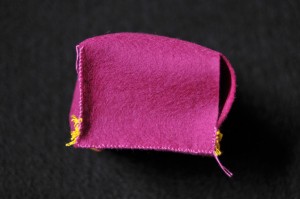
* You should now have something that looks like an armchair with a flap open at the bottom. Sew from one corner along two of the sides of the flap, leaving the third side open for turning/stuffing. In the picture I sewed a little more than the two sides, because I wanted to get over the lace trim, but the smaller the hole you leave is the more likely you are to stretch the felt out when you turn the chair. (If you are sewing from the inside.)
Also, you want to use a really long thread here, because you are going to want the tail for the seat shaping stitches. It isn’t the end of the world if you need to start a new thread when you are doing the shaping, it’s just inconvenient to hide the thread tails once the chair is sewed shut.
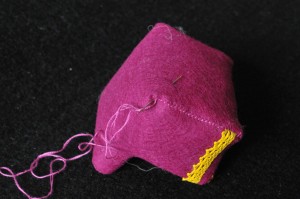
If your chair is inside out it should look something like the above picture. Congratulations! You should be done with the hoping and swearing part now.
If your chair is inside out because you were sewing the inside of the seams turn it right side out now and poke the corners as square as you want them.
Now it’s time to gently stuff the chair with fluff, holding the seat in with your fingers – you don’t want to end up with a balloon, help the chair keep it’s shape a little bit, but you do want it generously full. You’ll be fixing the shape with some shaping stitches in the next step.
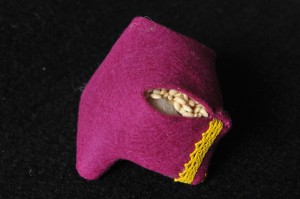
Put a little stuffing under the seat, but save most of the room in the bottom of the chair for your small beans or rice to help make the chair weighty and stable. When you are satisfied with the stiffness/fullness of the arms and back fill the rest of the seat with the rice or beans. You can see the rice trying to spill out of my chair.
Once your chair is full sew shut the third side of the bottom flap.
You might call it done now, but it’s time for some important shaping stitches to hold the bottom down. What you’re going to do now is stitch around the seat of the chair, more or less straight down to the bottom. This will make the seat look more cushion like and keep the seat corners from puffing up and loosing it’s shape.
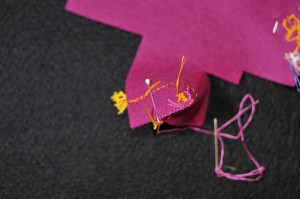
To start with take some small invisible stitches in from the corner you ended the bottom seam at in towards the center of the bottom about half an inch, until you are directly under one of the back corners of the seat. (You can see where the needle is coming up two pictures above.) If you want you can transfer the ‘Shaping Stitching Lines’ to the bottom of the chair to follow. Once you’ve found the stitching line corner and pulled your thread out the bottom of the chair, stitch straight up from the bottom through the back corner of the seat, pulling the stitch gently tight so that the bottom puckers in a little. Bring your needle back in further along the seat seam, a bit closer to the arm, like you were going to take a running stitch towards the front of the chair, but take the needle straight down and out the bottom. Continue this way sewing a running stitch through the 1/2″ thick seat, connecting the seat-arm seam and the bottom of the chair, until you get to half an inch from the front, then turn around and go back, then along the back seam of the seat, and up the other side seam to the front of the chair. You should end up with a U of shaping stitches all around the three (side and back) sides of the seat, pulling up a matching U in the bottom of the chair.
To manage this cleanly without mashing all the stuffing to one side it’s best to make two runs of shaping stitches, the first is more of a basting stitch, taking tiny stitches outside the felt, but large stitches traveling through the chair, and then once you’ve finished the U of basting shaping stitches make a second pass using a shorter stitch and pulling things a bit tighter.
Really I pulled the stitching in my purple chair much too tight and puckered the bottom much more than I needed to, it made my purple chair shorter too. The tan chair is a better example of how it should look, just tight enough to keep the seat from bulging up at the corners and giving it a nice cushiony look. If you want the arms of your chair to stand straight up rather than leaning out to the sides, you do need to pull these shaping stitches pretty tight.
Tie the shaping stitching off by taking a short back stitch and skimming the needle through the felt for an inch then cutting it off. Now you are done. Oh wait, you need to send me a picture, or link, then you will be done. 😉
Questions?
Tea Time!


21 Comments
Add Yours →WOW, these are amazing! SOOOO cute and I could use them for so many things… doll house, decor, the cutest pin cushion ever… Thanks so much for sharing this, I’ll be linking!
I am totaly impressed! This is sooooo great! Thanks!
Very creative!!! Amazing construction – I wish I could sew like you.
Adorable!! Thank you for the awesome tutorial ~ I’m definitely going to make some of these for my granddaughter’s dollhouse! =)
these are so gorgeous, i hope you dont mind that i have linked to them & your site on my blog. love your minature works
[…] when I created the tutorial for this felt doll house chair I wondered what would happen if I turned it into a toddler chair. Well, when the next One Yard […]
So cool! I might have to try my hand at this for some Christmas presents for my nieces!
Sorry my comment reply seems to have been broken for the last month without my noticing! I hope you have fun with the little chairs, I think they are fun to make!
What kind of fluff is that that you used? When I first looked at the picture, it almost looked like those little beans that you find in bean bags
[…] you remember these felt doll house chairs? (Complete with tutorial) And the pondering about whether they would scale […]
Thanks for your detailed instructions for the armchair! It was so useful!
I have sewed a little dollhouse to my 21-month daughter and 4-year-old son, in which now they can put the armchair sewed based on your tutorial!!! I have just sewed it not using felt, but polar, so it’s washable in washing machine. Furthermore I have sewed 4 beads in the bottom as chairlegs.
You can check it here:
http://www.flickr.com/photos/varga_katalin/
Thanks again!
Your dollhouse is wonderful, I love the spider web in the corner!
[…] this soft doll felt armchair for a little girl’s doll to sit […]
Your sofa is really ugly and stupid. Before do a tutorial, learn how to do cute things. Is childlish and the final result sucks.
I’m sorry you think my chair is ugly.
But I’m sure you can do better. The problem is that people don’t want give pattern or good tutorial of something for free.
Selfish people. I saw many many people who sell the sofa tutorial or pattern… at least your is free… but ugly unfortunately.
The other people should spread pattern for FREE. I’m not going to spent no even 1 cent for selfish people who wants to get MONEY from a PASSION and HOBBY. People who really LOVE crafting, gives ideas, exchange everything with others. Who want get some few money (because most people will NOT purchase a pattern) so at the end there’s no all this money to earn from this… so why don’t give patterns for FREE?
I never, EVER pay these kind of people! I made tutorial for doll dress all the time, and everyone who want pattern is FREEE. EVERYONE! I dont CARE to GET MONEY in THIS WAY! OK?
You sound really angry. I’m sorry I don’t agree with you, if someone makes something, if they put their time and effort into it, I don’t see why they shouldn’t ask people to pay money for it. If other people make it and give it away for free, fine, but why get in a huff if some people try to sell their work? If someone makes a beautiful pattern I will buy it. I enjoy supporting artists. If you prefer to give your work away for free that is fine too.
I made this for my daughter for Christmas to go with the Melissa and Doug Wooden Family Doll Set. I was nervous because though I knit, crochet, and sew, this was my first real venture with hand sewing. I turned out wonderfully! Halfway through I thought it would be too small, but it’s just perfect! Thank you! Your pattern opened my brain to a whole new way of thinking about making things!
I’m so glad it worked out for you! I love to teach people, so your note really made my day! 🙂 Thanks.
Hello i am kavin, its my first time to commenting anywhere, when i read this article i
thought i could also create comment due to this sensible article.
My website foggy window repair plano (Luis)
[…] by Katherine from One Inch World, so all the credit goes to her. Just check out her super adorable felt armchairs or wooden twig chairs. S-O-O-O C-U-U-U-T-E! Similarly, I fell in love with her felt salad leaves […]