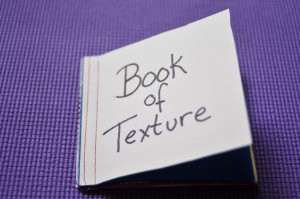
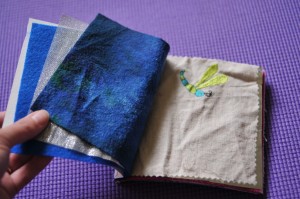
I was going to go all fancy pants with this, but then I just went and did it. Textures. No stitched edges or reinforced pages, no textures front to back, no glue, no labels or embroidery to distract, just some rectangles of stuff to touch that is sewn together. I even included some pages that probably won’t last, but that’s an interesting discovery of its own, destruction!
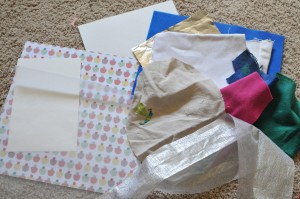
Step 1: Gather stuff. Different papers, different fabrics, whatever you have lying around. Something crinkly, something fuzzy. You can see from this picture that I did have something with embroidery, it happened to be the only linen in my scrap bag, but I might have gone with it anyway because dragonflies are cool, and who cares about rules anyway. Also the wildly mushroomy paper, but that went on the back – I decided I did want the non-patterned side facing forward in the book.
Step 2: Decide on a book size – I chose 5″x5.5″ because of the width of some watercolor paper I had in my stack of stuff.
Step 3: Cut everything the same size. I used my fabric cutting mat and rotary cutter for the fabric, for the paper I used my cutting mat and a box cutter. For some reason it never occurred to me until about a month ago that I could use my cutting mat with razor blades and such. I’m sure it will shorten it’s life, but hey, so useful. I used pinking sheers on the most ravely looking stuff.
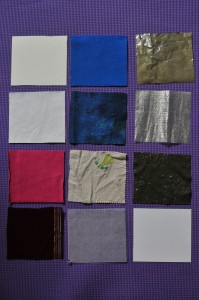
From the top left: watercolor paper, blue craft felt, the metallic liner of Annies whole wheat bunny crackers (shiny, crinkly, and sturdier than tinfoil), white denim, hand dyed flannel, some weird woven silver fabric (I have no idea where this came from, but it also happened to be exactly 5.5″ wide, so clearly it was destined), pink fleece, linen with dragonfly, fake suede-y stuff with little metal dots and glitter randomly scattered (who designs this stuff? My husband bought it for me to make a dice bag for him, and it was awful to sew), dark red velvet, doubled up wax paper (not going to last long), and scrap booking paper embossed with a woven pattern. My original musings called for some other things, but the day I made this that was what ended up in the random collection pile. I’m sure you can come up with your own wonderful collection of textures, maybe throw in some wood veneer and a layer of cork!
Step 4: Put them into a nice order, possibly with the papers alternating with the fabrics so they slide flat and don’t stick to each other, but whatever.
Step 5: This is the really exciting one, jam the whole thing under the foot of your sewing machine and stitch down one edge. Use a long stitch, and don’t sew too close to the edge or the whole thing will squeeze out the edge like when you’re trying to eat a melty ice cream sandwich, only less sticky. My first seam is about 1/2″ in. Then sew another line of stitching closer to the edge, and aim to get it straighter than mine.
Alternately, if you have real book binding skill you could stab bind it, or whatever you would do if you knew more about book binding than I do.
Step 6: Find a baby to play with!
There are all kinds of ways you could cute this up, adding ribbons, binding the edges of the fabrics with a zigzag stitch or sewing the more ravely fabrics face together along three sides and then turning them out… But this way I got it finished in the spare moments of a baby filled afternoon.
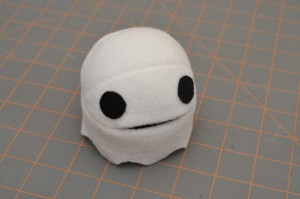
P.S. I really wanted to get the pattern for my Witch, Imp, Ghost and Bat Treat Hiding Balls into my sad empty Etsy shop before October (tomorrow!) but it’s just not going to happen. Wish me luck and bravery to get it all together by the end of the weekend. I’m making good progress. Here’s a picture of my finished Ghost, does he look a little psycho?

7 Comments
Add Yours →I love this idea, and your ghost is adorable!
Thank you so much for sharing this. It’s a great idea for babies, but I’m also thinking that I might make one for a friend whose son is autistic (and otherwise delayed as well).
this a great idea!
OMG, this idea is brilliant!!!! And I have a baby aside, hehe!
LOVE that idea! THanks!
[…] be better. This is a pre-no-brain-because-I-am-designing-curriculum project, harking back to my texture book tutorial but in 3D! Ooooh! (I am tired.) I used red, orange, yellow, brown and green, and I tried to arrange […]
[…] made this texture book for Lily after seeing this post from One Inch World. I originally intended to follow Katherine’s design of a proper book, but I […]