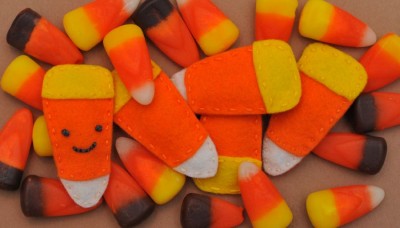
I may be a Californian, organic farmers market produce buying, canvas shopping bag toting, biking the kids to school mom (but not skinny or tan or particularly blond anymore…) but I still have an enormous soft spot in my heart for candy corn. They are utterly at odds with my post-kids value system, but I can’t seem to care. Maybe I should add irrational fruit cake to that first list!
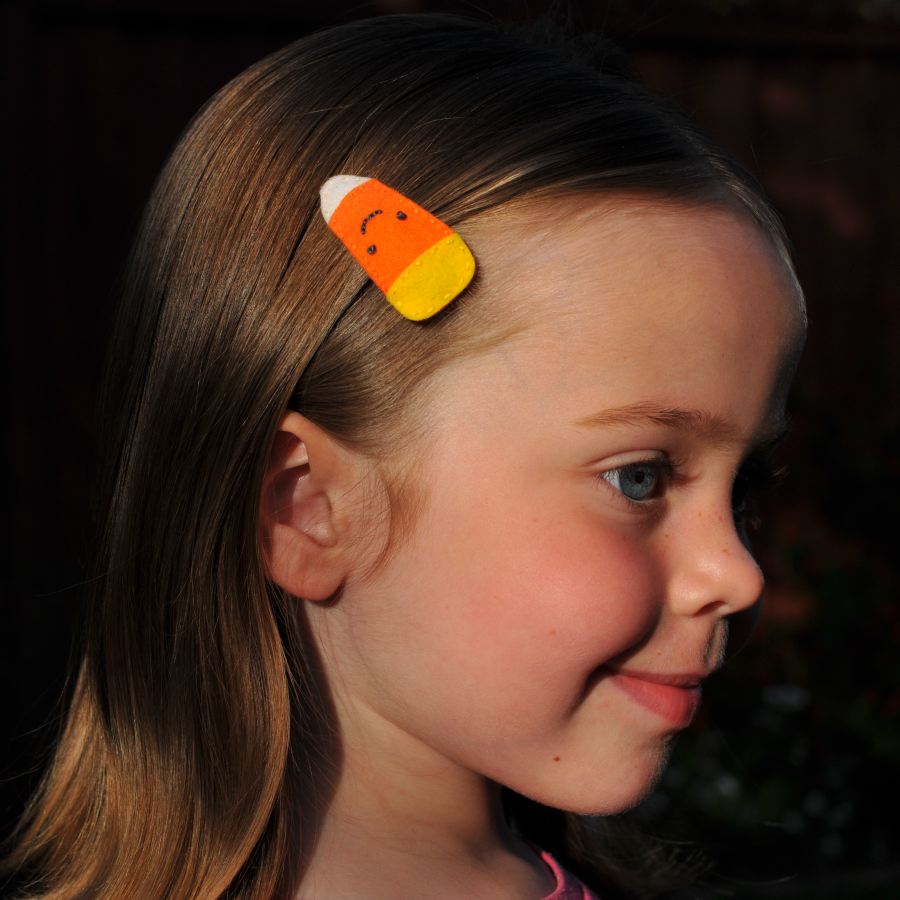
So for the glorious month of Halloween I had to make some candy corn barrettes. I think they are adorable. And look at my model’s nose, isn’t she cute! Mom, yes. These barrettes will make you cute too! And you can make them! Just download the pattern and follow the directions. P.S. I cannot take responsibility for any candy corn binges that may be triggered by these barrettes. (^_^)
Given the pattern pieces you can whip this together in whatever order you want, you really don’t need any instructions, do you? But the order I do things in ensures that you will only have to thread your needle once with each color of embroidery floss, and that the back will be trimmed to fit the exact way you’ve sewn the front.
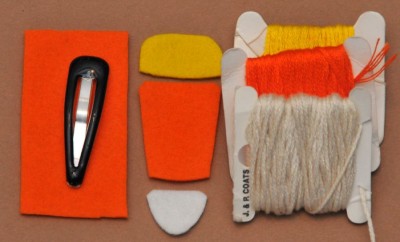
Materials:
* Candy Corn Barrette Pattern
* Bits of felt (wool is nice) in white, orange and yellow. These colors are easy to find in the craft felt section. I used Holland wool felt from Magic Cabin in White, Pumpkin, and Lemon.
* Matching embroidery floss
* One barrette, the pattern is sized for a 1.5″ long barrette, scale if you have a different length. I use the non-slip ones that have some kind of rubbery sleeve over the barrette’s prong.
(1) Scale your pattern to match your barrette length, and print. Compare your barrette to the barrette in the illustrated assembly diagram to make sure the size matches.
(2) Cut out all the pieces.
(2b) If you want a face, embroider it on now. The one Rebecca is wearing is a simple smiley with french knot eyes and a back stitched mouth.
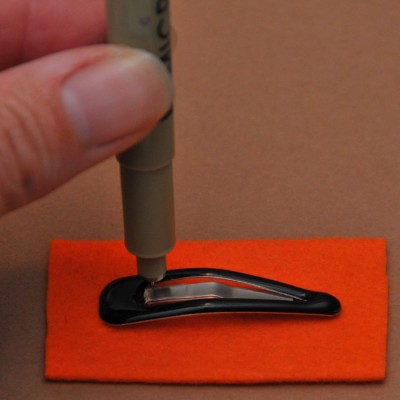
(3) Take your backing piece, and center your barrette over it. Mark two points on either side of the base of the barrette’s prong. Cut a slit between the two points.
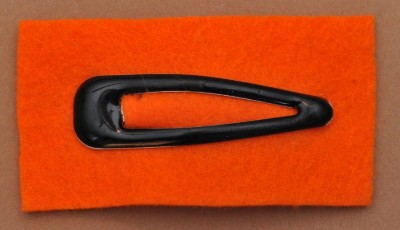
(4) Open the barrette and insert the prong through the slit in the felt backing piece as far as it will go. Close the barrette to hold it in place.
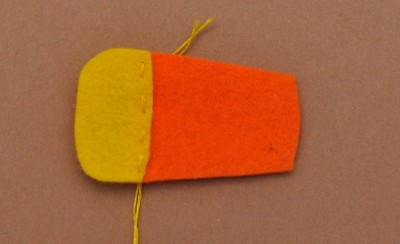
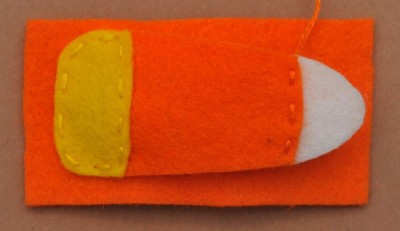
(5) Thread 2 strands of yellow floss onto your needle. Overlap the yellow base piece of the candy corn over the center piece and sew with a running stitch.
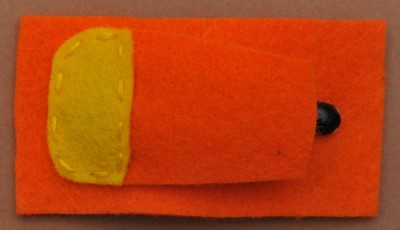
(6) Position the center and base pieces over the barrette and backing felt and sew the rest of the way around the yellow base piece of the candy corn. Secure and cut your floss.
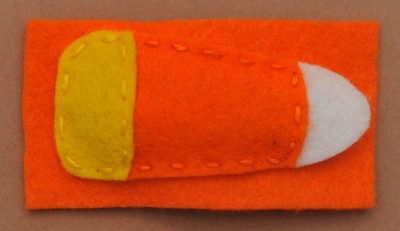
(7) Thread 2 strands of orange floss onto your needle. Slide the white tip piece just under the edge of the orange center piece and sew them together.
(8) Continue your stitching along the edge of the orange center piece, slip your needle in between the layers of felt to the remaining edge of the center piece and sew that down. Secure and cut your floss.
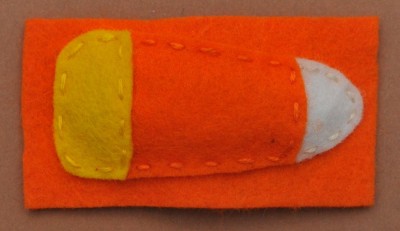
(9) Thread 2 strands of white floss onto your needle. Sew down the loose point of the candy corn. Secure and cut your floss.
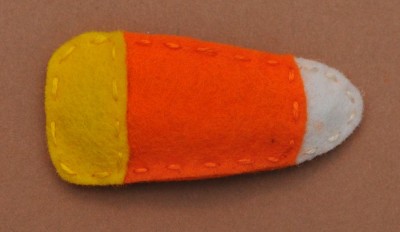
(10) Neatly cut around the candy corn trimming away the extra backing felt. Done!
Tips: I start my stitching with a small knot hidden between the layers. I secure my tail by taking 2-3 tiny lock stitches right on top of each other, then skimming the needle through the back of the felt and cutting it off very close where it comes out.
Useless trivia: I had to shoot this whole tutorial twice because the first time it looked SO AWFUL! (;_;) I got as far as uploading all the images, starting to look at the tutorial previews and I just couldn’t take it. (>_<) Why are tutorials so much more work than you are expecting? I can’t answer that.
So, I ended up making a lot of these, and I will be giving out TWO, (not the one with a face) randomly, to people who comment on this post by Friday the 15th. I will be rolling the dice and packing things up Saturday morning (16th), Pacific Time for you last minute people. One extra entry if you blog about this tutorial/giveaway, 5 extra entries if you make one of these barrettes and put a picture up publicly on your blog or flickr, or wherever. Because that makes you awesome. (^_^) [Edit: That is silly, why would you want one of my barrettes if you made one yourself? If you do want one, go ahead and add 5 comments for yourself, or you can add one comment that says Monster Ball Pattern, and I will enter you in a separate drawing for one of those. You know, if only one person makes them before next Friday, you are a guaranteed win!]
[Edit: The giveaway is closed, but you can still comment on the tutorial if you have questions, etc.]
Tomorrow (night probably) I will be putting up a couple of these barrettes in my Etsy shop if you just want to buy one. Hand stitched! Natural wool felt!
And remember that cute monster ball pattern with candy pocket in my Etsy shop, if you need to make something extra special to give someone candy in.

25 Comments
Add Yours →I completely share you love of candy corns, even though they are full of awful stuff! I’ve put off buying them, so far – maybe I’ll make some of these instead? I’m horrible at actually making things lately…
Well, your blog makes it seem that you are doing enough with your children to completely justify getting nothing else done. (But you do, of course.)
After seeing your tutorial I am not only CRAVING candy corn, but want one of these barrettes for my daughter AND for myself!
Thanks so much!!! If you don’t win I hope you will make yourself a set. 🙂
What cute barrettes! Thanks for the giveaway.
🙂 Thanks so much!
[…] These cute little candy cane barrettes are MUCH quicker. I used this great tutorial by Katherine at One Inch World. Her technique for partially sewing the pieces together for the top of the cover and then sewing […]
I made some! Even though 1) I don’t even like the taste of candy corn (I just think they’re cute!) and 2) I don’t have a little girl (but I do have a niece). So please enter me in the “monster ball pattern” giveaway! http://www.stitchcraftcreations.com/2010/10/10/candy-corn-cuteness/
You are so awesome Holly.
Oh so cute. Hope I’m not too late for the give away…..
Nope, you’re in. 🙂
You have one one of my two barrettes julie! Please send me your address. 🙂
I went out to buy felt today to make these awesome cuties, but couldn’t find the colors…. so I’m hoping I win….
Really? No one should be allowed to be out of white/orange/yellow near Halloween…
And you did win one of my two barrettes! 🙂 If you want I will also send you enough felt to sew another one too. Please send me your address.
These are super cute. I love the Holland wool felt– it’s so soft and gorgeous.
Thanks! I love the wool felt too, my husband doesn’t understand why I need so much of it!
[…] a reminder, that today is the last day to comment on my Candy Corn Barrette Tutorial to win a candy corn barrette. I am happy to ship internationally. I clearly haven’t learned […]
These candy corn barrettes are adorable! I really want to make these for my two granddaughters, as soon as I finish their Halloween costumes. Thanks for the tutorial.
Thanks! They are quick, while around here Halloween costumes may never get done!
So cute! I am going to make some for my girlies- they love pretty barrettes!
Thanks! I’m really getting into making different felt barrettes, I need to get around to posting the mushroom and ghosts I’ve done now…
Cute…
Those are so cute! My daughter would love it!
Thanks!