Happy 10/10/10! And don’t forget my barrette giveaway, open until 10/15!
 If there was a contest for craft blogger with smallest crafting space, I might win. My ‘studio’ consists of 5’x4′ in the corner of the living room. Maybe not quite that big. More like 3.5’x4.5′. Most of it is taken up by my table, and actually half the space under that is my daughter’s art caddy. There isn’t actually room for a chair, when I’m using my sewing machines I sit on the arm of the couch, which is squished too close to my table for a chair to fit. Which, really, works amazingly well, sort of like a standing computer desk. I always felt like sitting down in front of my sewing machine was such a commitment, and I was always needing to pop up for some bit every three minutes anyway.
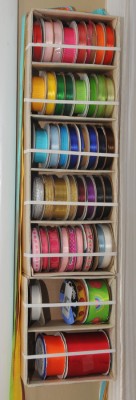
Now I’ve made it sound like I live in some kind of shack, which I don’t, but it is very small, and I’m constantly trying to cram things into any little space. Which brings us to my ribbons, which have been unhappily floating around for the last year, since before our move really. For a while they leaned in a corner strung on a long 1/4″ dowel, for a while I had them all strung on a string hanging from the end of the curtain rod behind my table… It was sort of pretty, but this weekend I found myself not using a ribbon because it was too hard to get off the spool! Not acceptable! So I whipped up this ‘lovely’ ribbon holder, which fits in the 6.5″ between the front door and the window behind my sewing table. It’s a little bit like living on a boat, which by the way, my mother does. I think she’s crazy, obviously I am too.
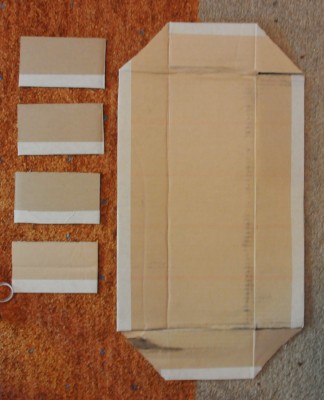
This is an easy thing to make, if you have a glue gun. Just cut some cardboard like you are making a shoe box, and some shelves to fit inside. Cover the edges that will be in the front with masking tape, or maybe colored painters tape, or that fun patterned duct tape. Hot glue the shelves to the back, then put hot glue on the sides where the shelves will touch, and fold those up. Then glue in the corner flaps to hold the box together. Glue 1/4″ elastic to the outside of each shelf, stretching across the openings, to keep your spools from rolling out. Really this is very much like a bookcase on a boat. Load up your spools, realize you need to make another one because the first is already full, then use double sided mounting tape to stick the whole thing to your wall. 🙂 If you are feeling decorative you could cover the outside with nice paper or fabric. I was not feeling decorative. But I think I might glue a hook on the side to hold my scraps, which there are quite a lot of, currently knotted into two bundles sorted by length, crammed into a tiny drawer with all of my other ribbon that is wound around cards or rolled into bundles… Not to mention my rats nest of a lace collection in the drawer above it.
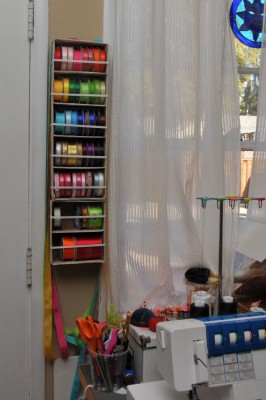
Here is a glimpse of a tiny bit of my tiny space with the ribbon holder. I need to create some more wall storage on the other side of my table for tools, then maybe I will take a picture of my sewing corner.
I think this project was indirectly inspired by Melissa’s button organizer over at Until Wednesday Calls.


8 Comments
Add Yours →I love it! Finally a ribbon holder I can make with things I have at home.
Thanks!
Awesome, I hope you make one! I’ve found you can make just about anything with cardboard and hot glue, together they are practically unstoppable. 🙂
I need to do something like this to store more stuff in my computer hutch turned sewing hutch!
Also, I saw your cute barrettes over at stitch/craft this morning 😉
Yes, Holly wins the awesome award for actually making my barrettes so quickly.
This is really quite clever! And resourceful, and I like how you mention the minimal amount of space you use/need. I also like the above comment about having everything on hand!
I also laughed because I keep my ribbon in a suitcase right now and have found myself avoiding ribbon because of it! So I know I will be bookmarking this one for future use!
Yes, I thought stringing them all on a dowel was a beautiful solution, except for the part about using them less…. I don’t know how much space I need, just how much I have… I wouldn’t mind more…
p.s. Thanks for mentioning my button binders!
[…] diy cardboard hanging shelves – Source […]