Matryoshka Prototypes Post date March 29, 2009 Posted in Crafty Tagged with Crafty, doll, embroidery, toy Comments 1
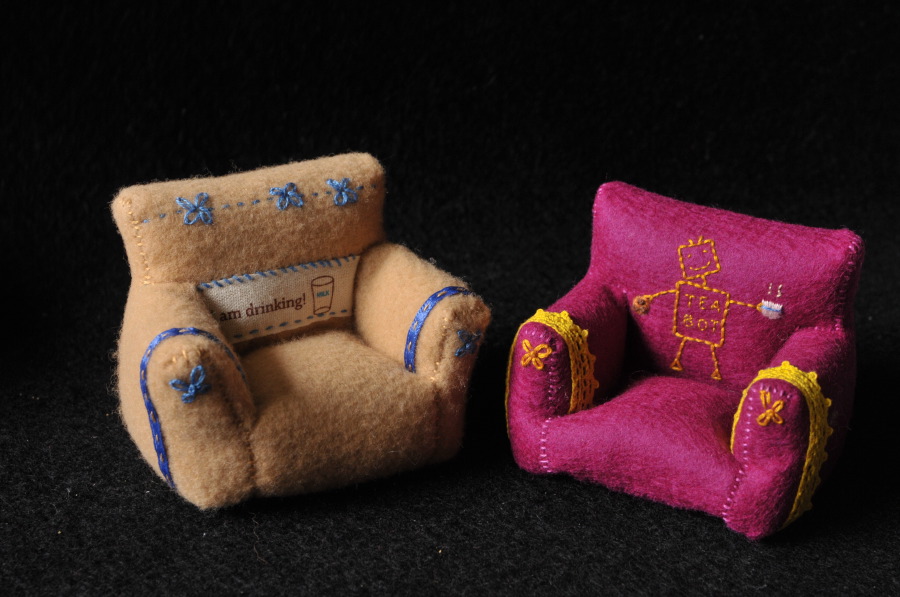
Felt Armchair Tutorial Post date March 20, 2009 Posted in Crafty Tagged with Crafty, doll house, embroidery, felt, furniture, miniature, toy, tutorial Comments 21
Book of Hearts Post date February 15, 2009 Posted in Crafty Tagged with Crafty, embroidery, felt, toy Comments 2
Phonics Miniatures Swap Post date January 31, 2009 Posted in Crafty Tagged with Crafty, embroidery, felt, food, Homeschool, miniature, swap Comments 5
What is this? Post date January 16, 2009 Posted in Crafty Tagged with Crafty, doll house, embroidery, felt, furniture, miniature, sewing Comments 10
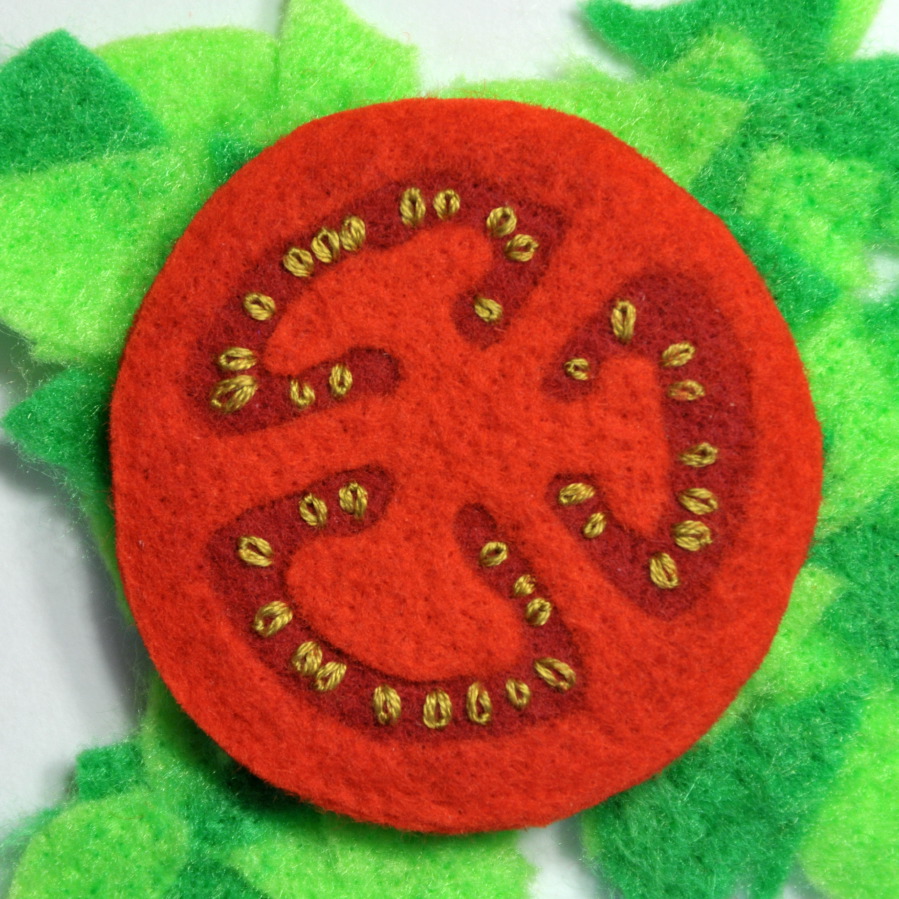
Felt Tomato Slice Tutorial Post date January 1, 2009 Posted in Crafty Tagged with Crafty, embroidery, felt, food, needle felting, tutorial Comments 58